What is the guide to activating WhatsApp integration in ManyChat about? #
- The main purpose of this guide is to help you activate the WhatsApp integration.
- Another important goal is to ensure we build the right features for you, so please don't hesitate to provide direct feedback on any missing features or errors you notice.
WhatsApp Channel Activation #
Activating the WhatsApp channel means you can start exchanging WA messages with any number of contacts through the ManyChat platform, without any limitations.
WA activation is done in two steps:
- 1) Connect your WA account in the settings when you have an existing ManyChat account or create a new ManyChat account (sufficient to respond to inbound messages within 24 hours)
- 2) Obtain WhatsApp approval by completing business verification (for unlimited outbound messages)
The rest of this document explains these steps in detail.
What you need to complete these steps. #
For Step 1: #
- ManyChat account. You can start for free, but when you reach 1000 contacts or 1000 conversations, the system will prompt you to upgrade to PRO.
- Administrator permissions for the ManyChat account.
- An admin role in the Facebook Business Manager of the business that will have the WA number and use the WA bot for their benefit. If you are an agency, it cannot be your business account, as in this case, WhatsApp may reject you.Step 2 Please use the client's business account.
- Log in to your personal Facebook account that has access to the business you want to connect to the WhatsApp API.
- The phone number to be linked to your bot. If you do not have one, you can choose a number provided by ManyChat during the registration process (only available if you connect WA to an existing ManyChat account as a second or more channel).
For Step 2: #
- You need to have aReal business operations, this should comply with WhatsApp policies
- Upload legal documents for review to prove the legitimacy of the business (also known as business verification).
We strongly recommend that you complete these steps in the order shown in this guide. Start with Step 1, as it is quick, simple, and allows you immediate access to WA automation. Then continue to gather documents and upload them one by one for business verification.
Step 1: Connect WA account to ManyChat #
Objective:
- Grant ManyChat permission to manage your business on Facebook
- Create a WA business account (WABA) and WA profile. Connect and verify the phone number
- Access unlimited inbound messages from WA contacts
Time required: 5 minutes
The main benefit of activating the WA channel through ManyChat isthat you can start using WA automation to handle incoming messages from customers immediately, without waiting for full business verification. Another good thing is that you can get the first 1000 conversations for free. Since Meta charges businesses for using WhatsApp, you will need to pay for each conversation beyond this amount. Payments can be made through the ManyChat wallet (PRO required). View WhatsApp pricing details here.
how is it
- 1) Log in to your existing ManyChat account that needs to be connected to the WA number or start creating a new ManyChat account (in this case, select WhatsApp on the channel screen and click connect on the next screen, then continue with Step 4 of this instruction to proceed).
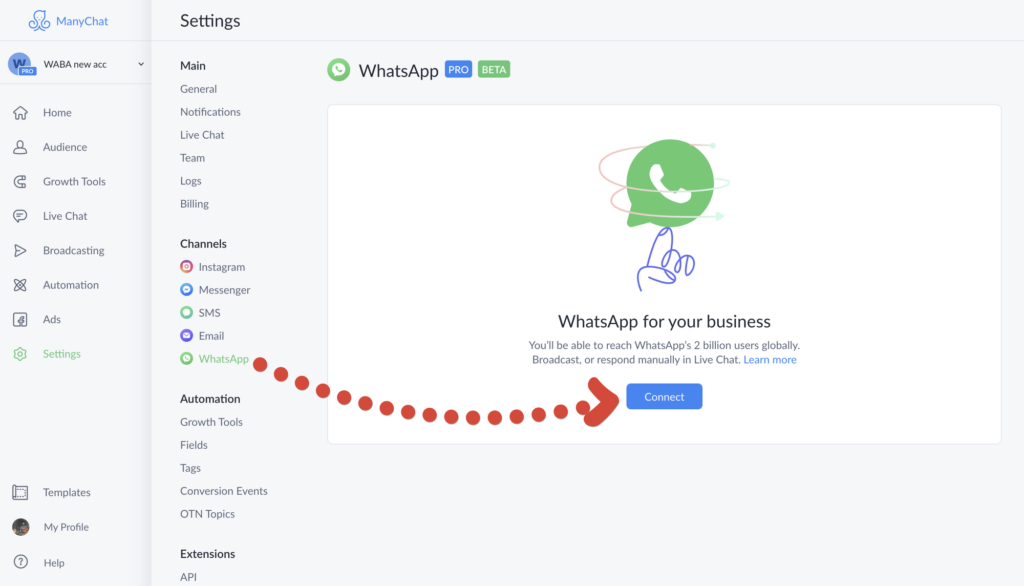
- 2) For existing ManyChat accounts: Go to Settings → Channels → WhatsApp and click the “Connect” button
- 3) For existing ManyChat accounts: On the next screen, the system will suggest that you continue using the phone number provided by ManyChat. If you do not have a brand new phone number for WhatsApp integration, we strongly recommend that you use this option. ⚠️ We不advise against using your personal phone number or any number that is connected to any WhatsApp application. Due to Facebook's restrictions, once connected to ManyChat, you will not be able to use this number for any other WhatsApp applications.
- If you have your own number that meets the above requirements, you can choose the “Connect my own number” option and follow the instructions on the screen. If this is your choice, you can scroll down to item 4.
- If you choose to use a new phone number from ManyChat, the system will ask you to select the country code for that number.

- The number of available countries/regions is limited. However, each ManyChat number is applicable internationally, so even if your country/region is not on the list, you can still choose any other country/region. In this case, we recommend using a US number. You can start testing the WhatsApp integration with a ManyChat number and then change it to your own number later (for this, go to “Settings” and delete the old number first).
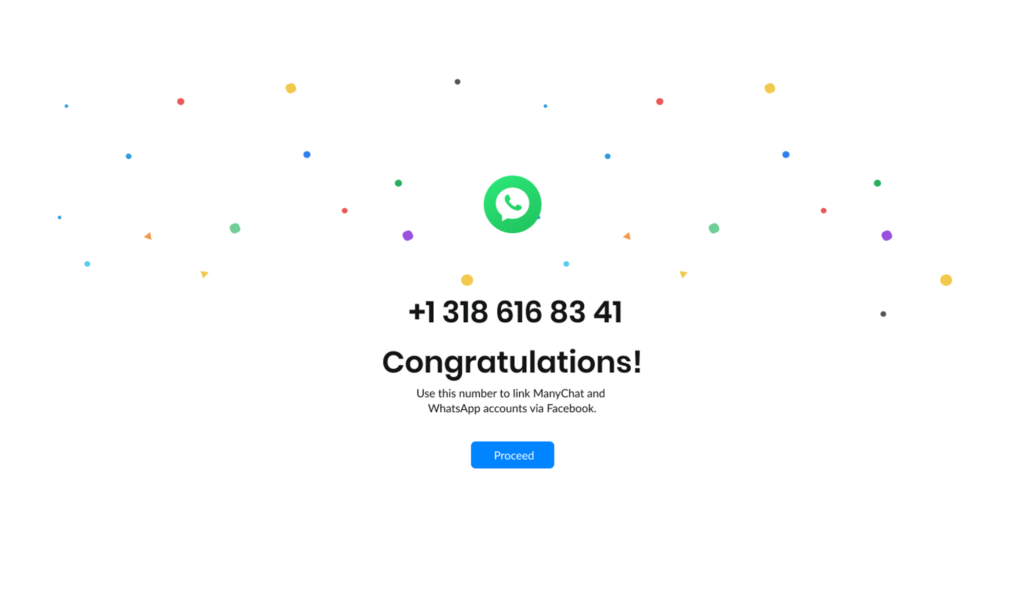
- Once the number is issued, please click the “Continue” button.
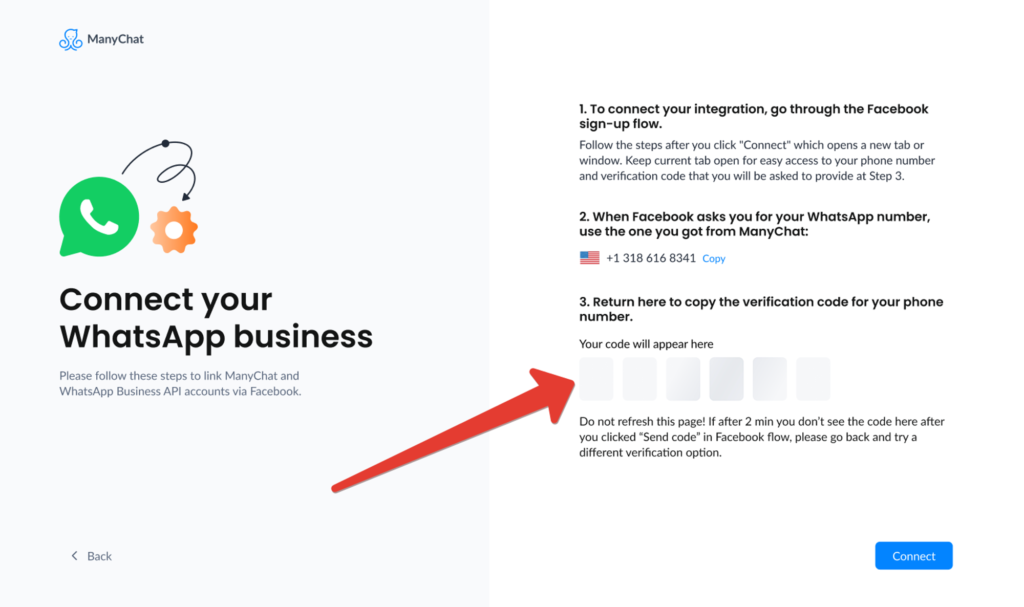
- You will be redirected to a page with more instructions. You can copy your new phone number and then click “Connect.”
- ⚠️ Important!The verification code for the phone number will be displayed on this page. Please do notclose or reload this page before the registration process is complete, otherwise, you will have to start over.
- 4) Next, you should see a pop-up window with the Facebook login screen. Log in as needed. Please do not close the tab with the ManyChat account! If you accidentally close it at any point, we recommend starting over.
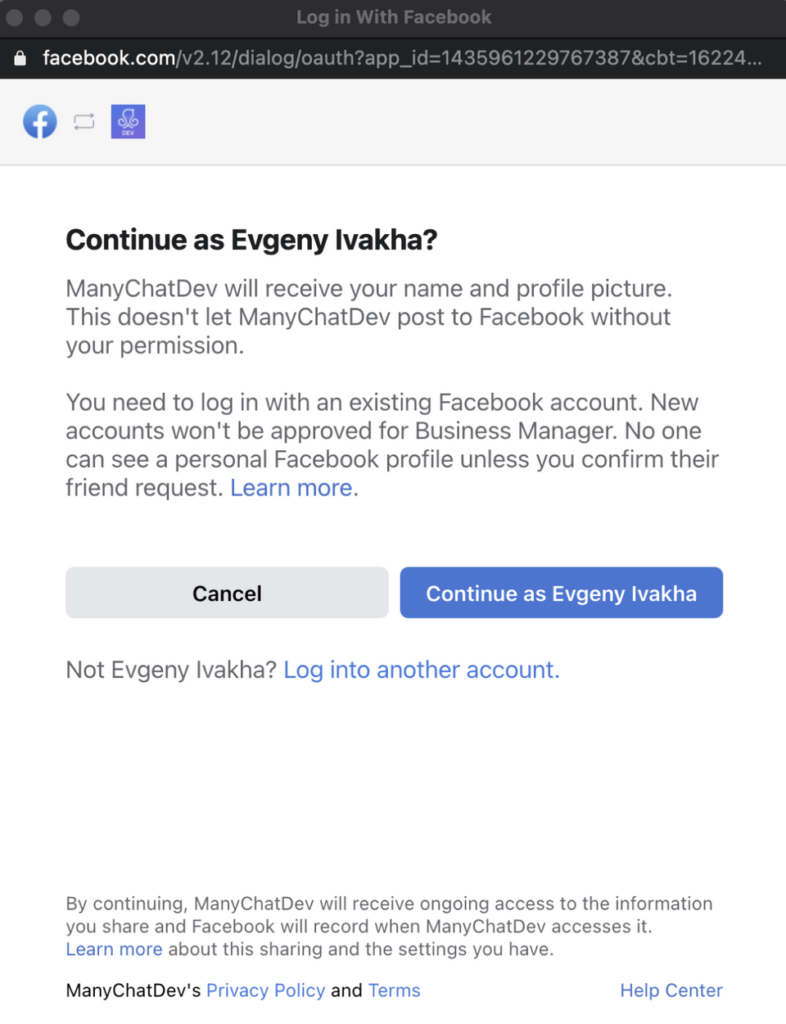
- 5) From there, follow the instructions on the screen to grant permissions to the ManyChat application.
- 6) In the next step, select the Facebook business account that will own the WA number. Remember!
- If you are an agency and you are connecting WhatsApp for your clients, it cannot be an agency's business account; please use your client's business account.
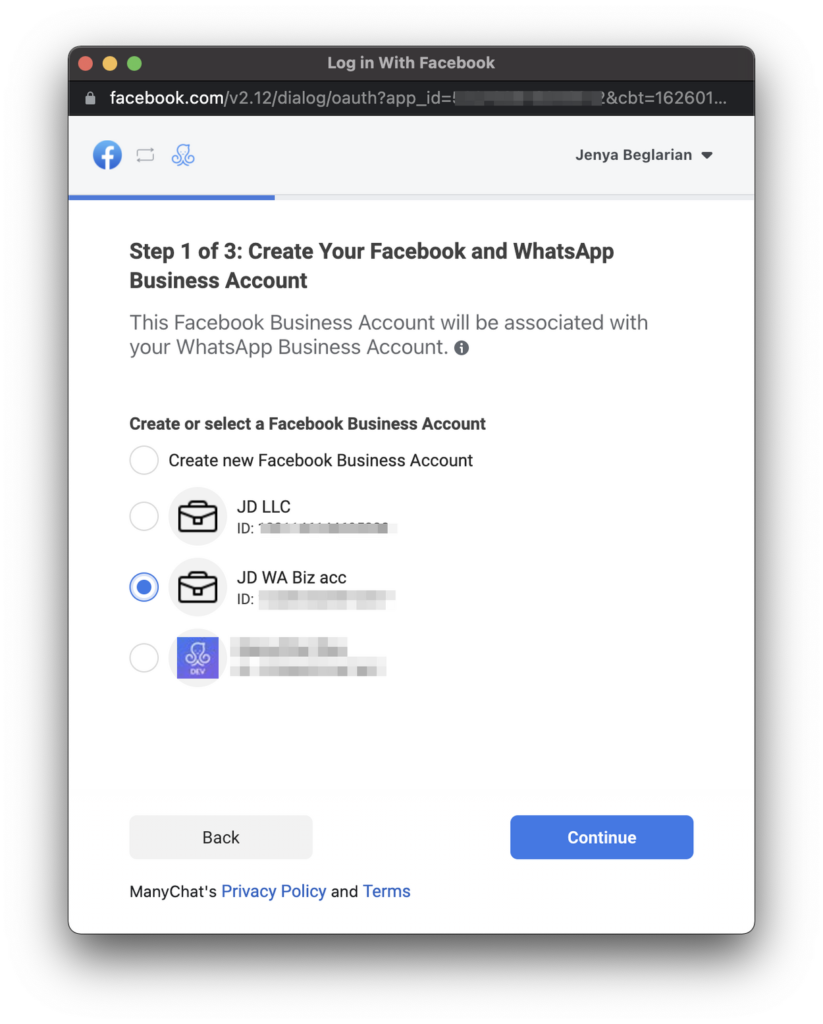
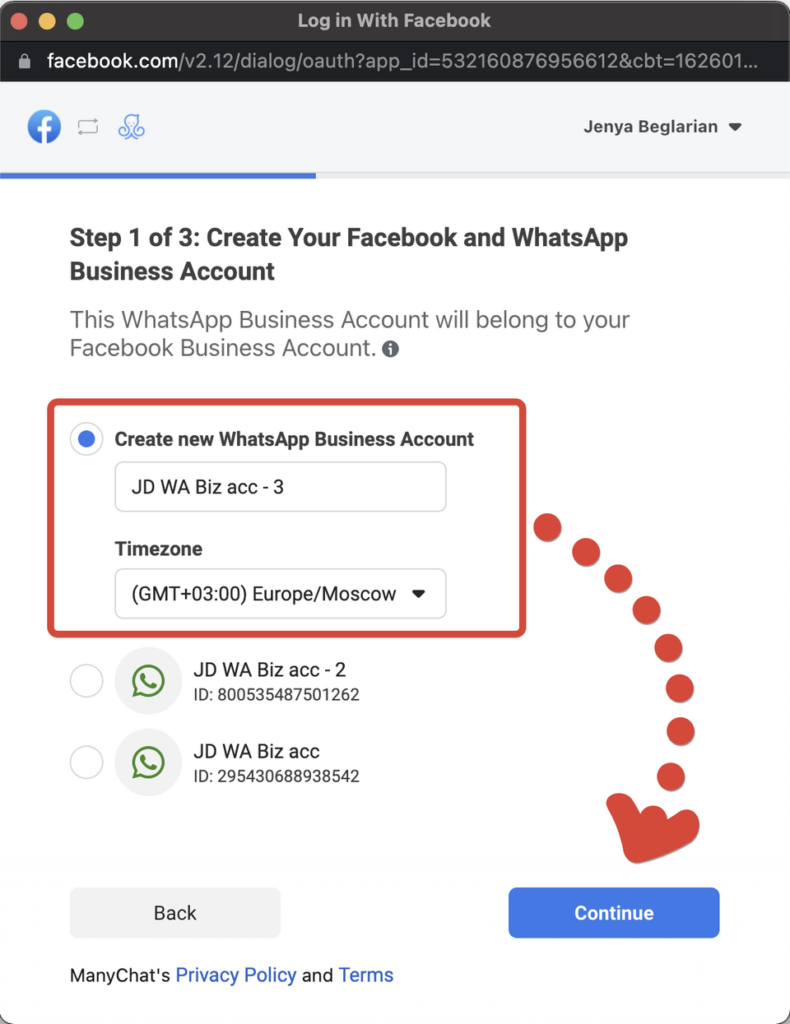
- 7) In this step, you need to create a new WA Business Account (WABA) or select an existing account. If the business you selected in the previous step does not have a WABA, the system will default to requiring you to create one.
- See screenshot. The business selected in the previous step has a previous WABA:
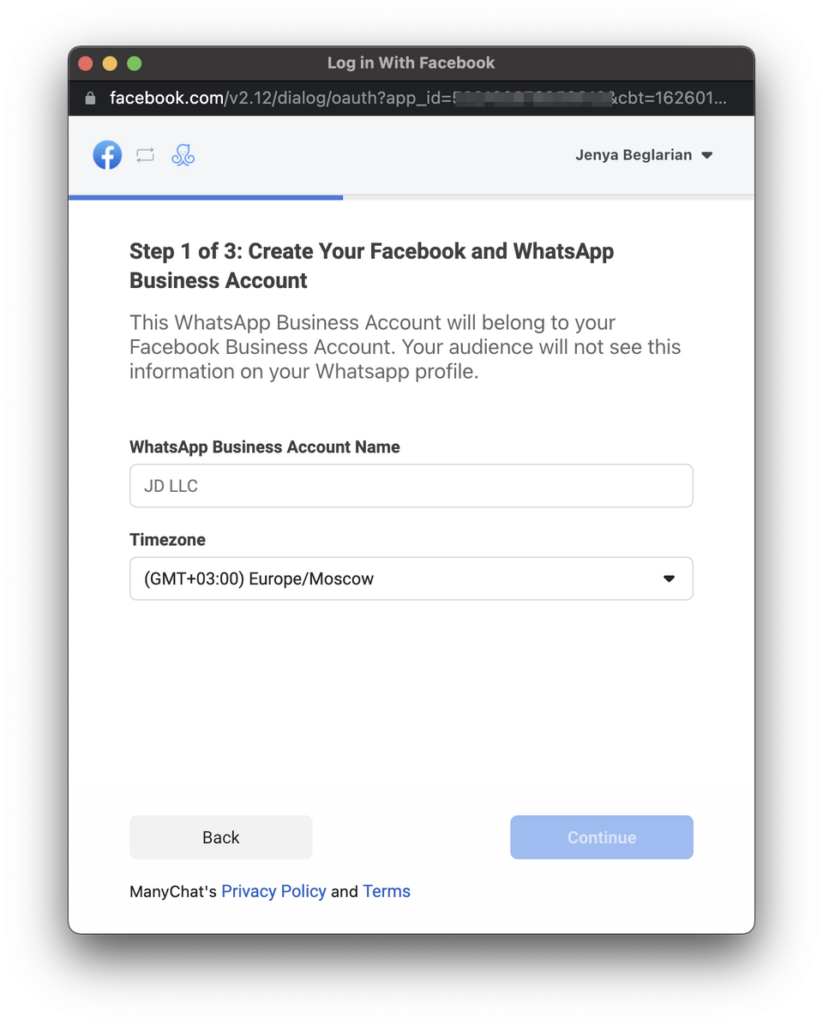
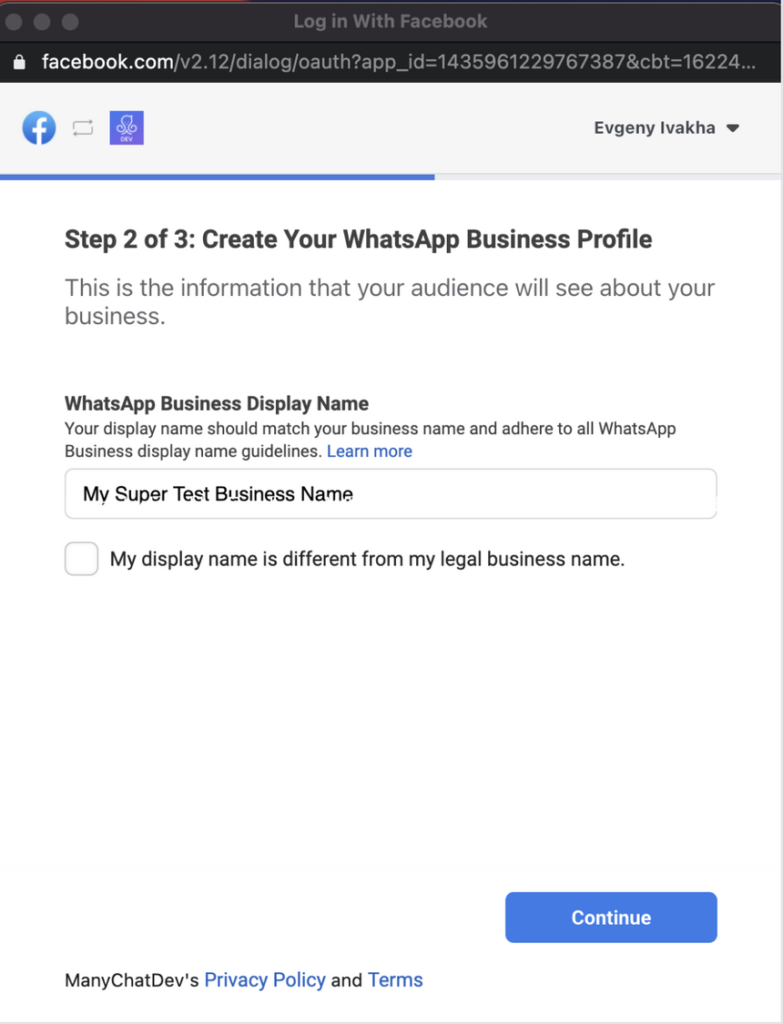
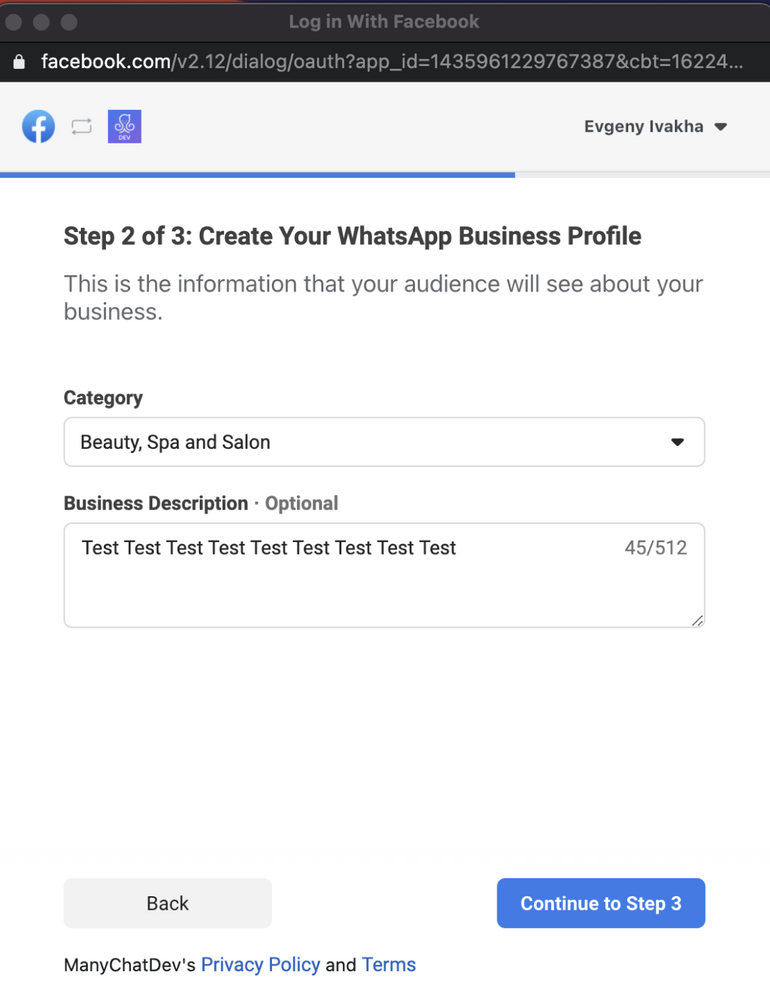
- 8) Fill in your WhatsApp Business display name (the name your customers recognize you by in the WhatsApp application). Please note that you need to comply with Facebook's display name guidelines, otherwise your application will be rejected. Click “Continue” and specify the business category and description.
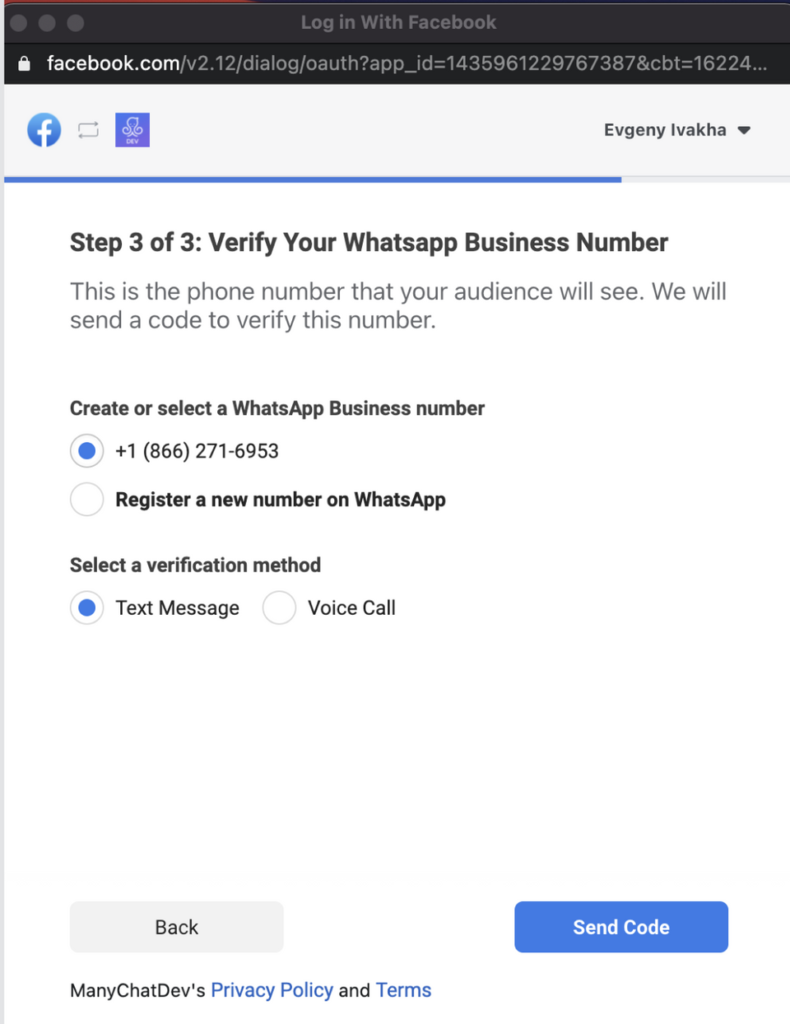
- 9) The next step is to connect your phone number.
- ⚠️ Please note! We strongly recommend that you use a new phone number that is currently not used with other WhatsApp applications for the following reasons:
- — Facebook does not allow phone numbers connected to WhatsApp or WhatsApp Business applications to connect with ManyChat unless you delete your account from these applications.
- — After deleting the account,you will lose all contact databecause WhatsApp and WhatsApp Business do not have the capability to back up or transfer data to ManyChat.
- — Once the phone number is connected to ManyChat, Facebook willnotallow you to switch the phone number back to the WhatsApp or WhatsApp Business application. *Similarly, if you think you might need your number for other WA applications in the future (for example, for the WhatsApp Business application or personal WhatsApp application), please do not use it and preparea brand new phone number *
- instead. You can also use the number provided by ManyChat (this feature is only available when you activate WhatsApp as an additional channel for an existing account).
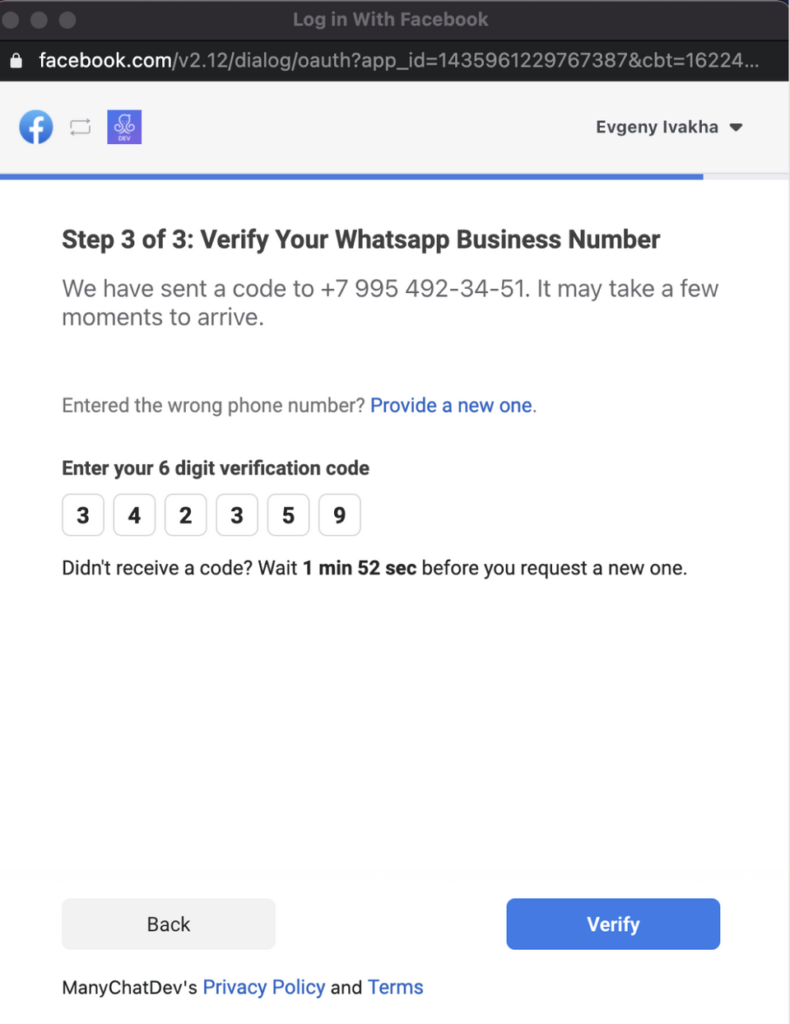
- Select the “Register a new number on WhatsApp” option. Use the phone number provided by ManyChat. You can also use your own number, but please remember that the number should be able to receive SMS or voice calls (at your choice), as Facebook sends the verification code to you in this way.
- If you encounter issues receiving the verification code using the selected method, please try going back and selecting another method. Make sure you have disabled IVR/call forwarding for this number.
- 10) If you reach this screen, it means you have successfully completed the previous steps. When you click “OK,” this window will close. Return to your ManyChat account.
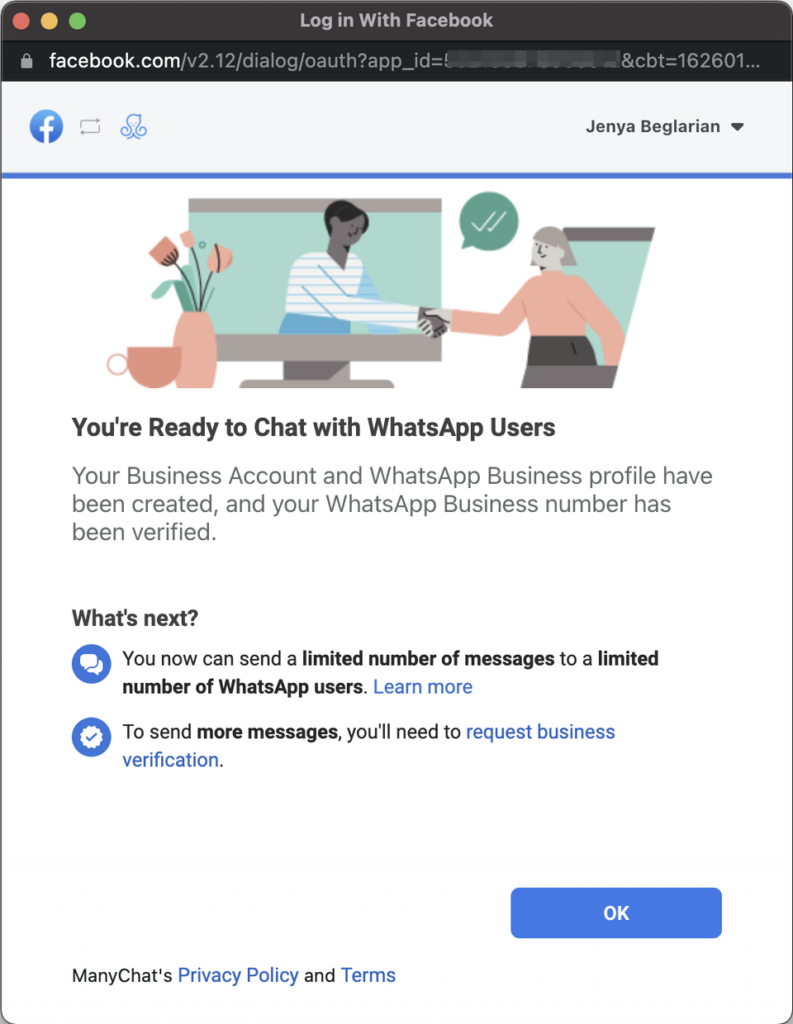
- Expected results
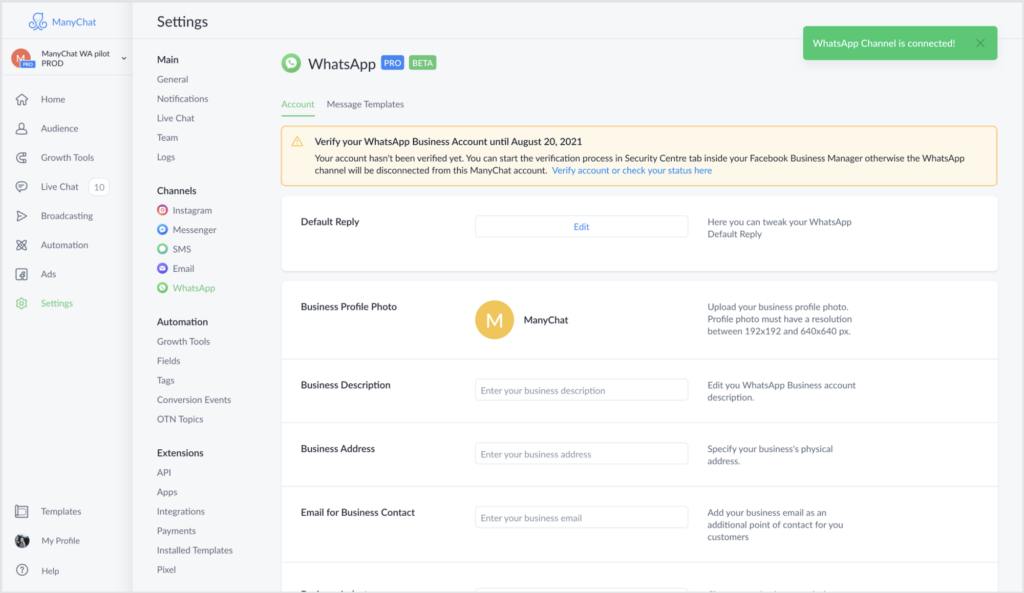
- If you can smoothly complete all the previous steps, the screen with the “Connect” button will automatically update to:
- For existing ManyChat accounts:
- For newly created ManyChat accounts: you will proceed to the next step of the account registration process.
- Please remember that the initial use of the WA channel is limited to responding to inbound messages within the next 24 hours. To access outbound messages that allow you to send messages to contacts outside the 24-hour message window without restrictions, you need to complete business verification (see below).
Step 2: Obtain WhatsApp approval by completing business verification. #
- Objective:
- Upload legal documents to Facebook's Security Center
- Get extended testing mode the day after uploading documents to the Security Center
- Unrestricted full access to inbound and outbound messages
- Time requiredOn average, we can see that users need a total of 2 to 3 weeks to upload all necessary documents, and the WhatsApp team reviews the documents to make approval decisions.
- Although these steps may seem complex and time-consuming, we can confidently say that it is entirely feasible, as dozens of our clients have completed business verification. Remember, after all, you can access the WhatsApp channel without restrictions.
- Good luck! ☘️
- How to set up
- 1) Log in to the ManyChat account related to the business you want to verify. On your homepage, you should see this notification banner; click it to go to your Business Manager:
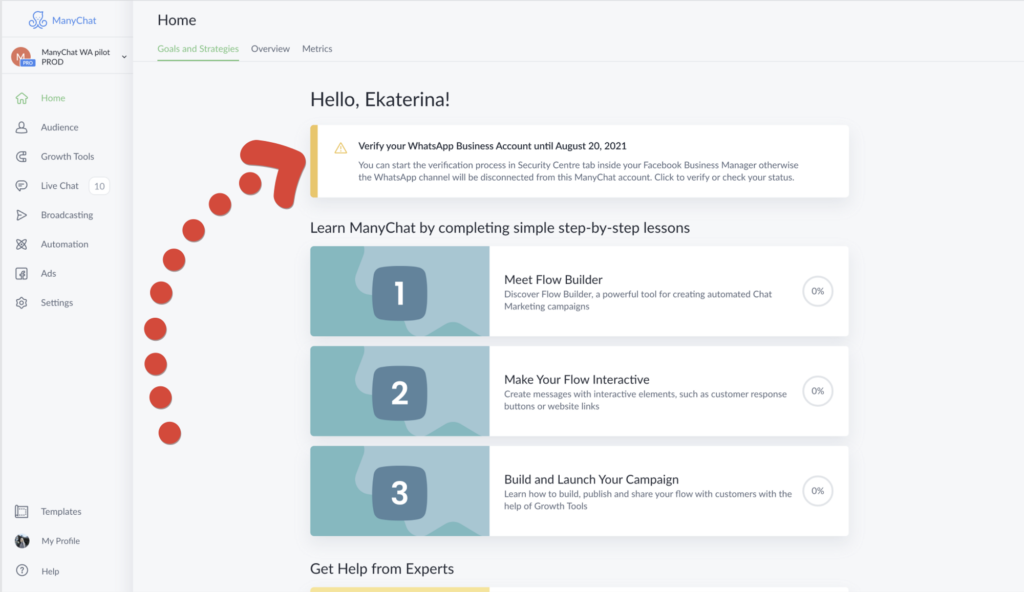
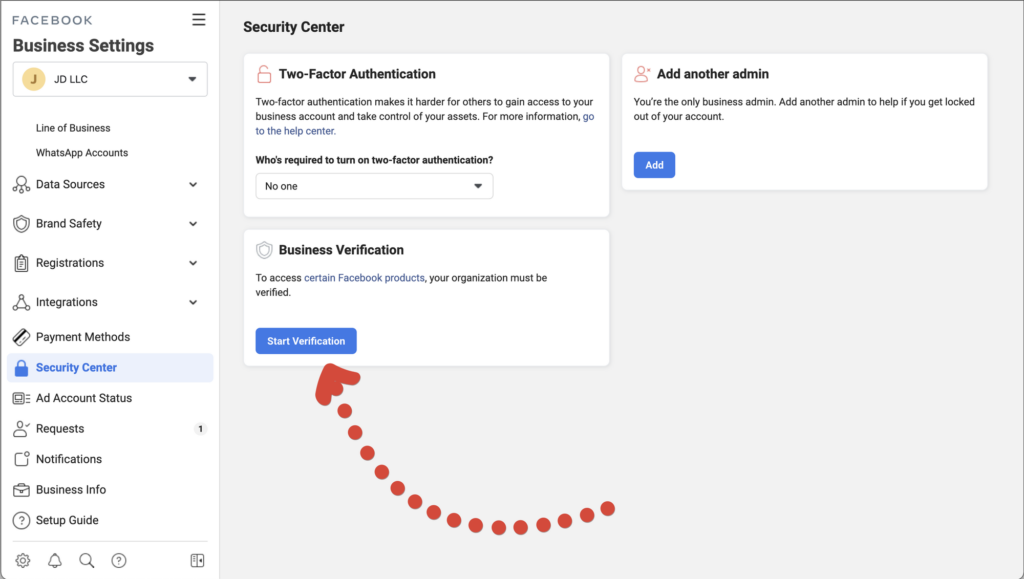
- If the link is invalid, please go to the Facebook Business Manager of the business to be verified → Settings → Security Center.

- 2) Click the “Start Verification” button
- 3) Follow the on-screen instructions to provide data and upload all required documents.
- <旁白>
- 💡 Tip 1
- Provide some evidence that your company's fantasy name (alias) is associated with your legal name in the documents. A simple copyright in the footer section of your website will suffice.
- <旁白>
- 💡 Tip 2
- The provided business email should have the same domain as the business website – otherwise, it may raise some issues with Facebook's Trust and Safety team.
- Be sure to check your business inbox and emails from the Facebook/WhatsApp team, as they may request additional documents or clarifications.
- Read more about business verification in the FAQ section below.


