ManyChat Live Chat is a tool that allows you to communicate directly with subscribers through ManyChat.MessengerorSMSIt enables you to jump into conversations and answer questions, manually manage subscriber data (add tags, subscribe to sequences, add custom field values, etc.), and send them messages.
Live chat behavior #
The live chat behavior allows you to set 2 options for live chat:
- “The ”Any message will start a conversation“ option opens a new chat in the ”Live Chat" section with any messages from users (excluding keywords).
- The “Conversation with this subscriber should be explicitly opened” option only opens a conversation when the subscriber performs an action attached to a “button” or “quick reply” (which can also be initiated by an admin when needed).
Go to “Settings” > “Live Chat” to manage behaviors.
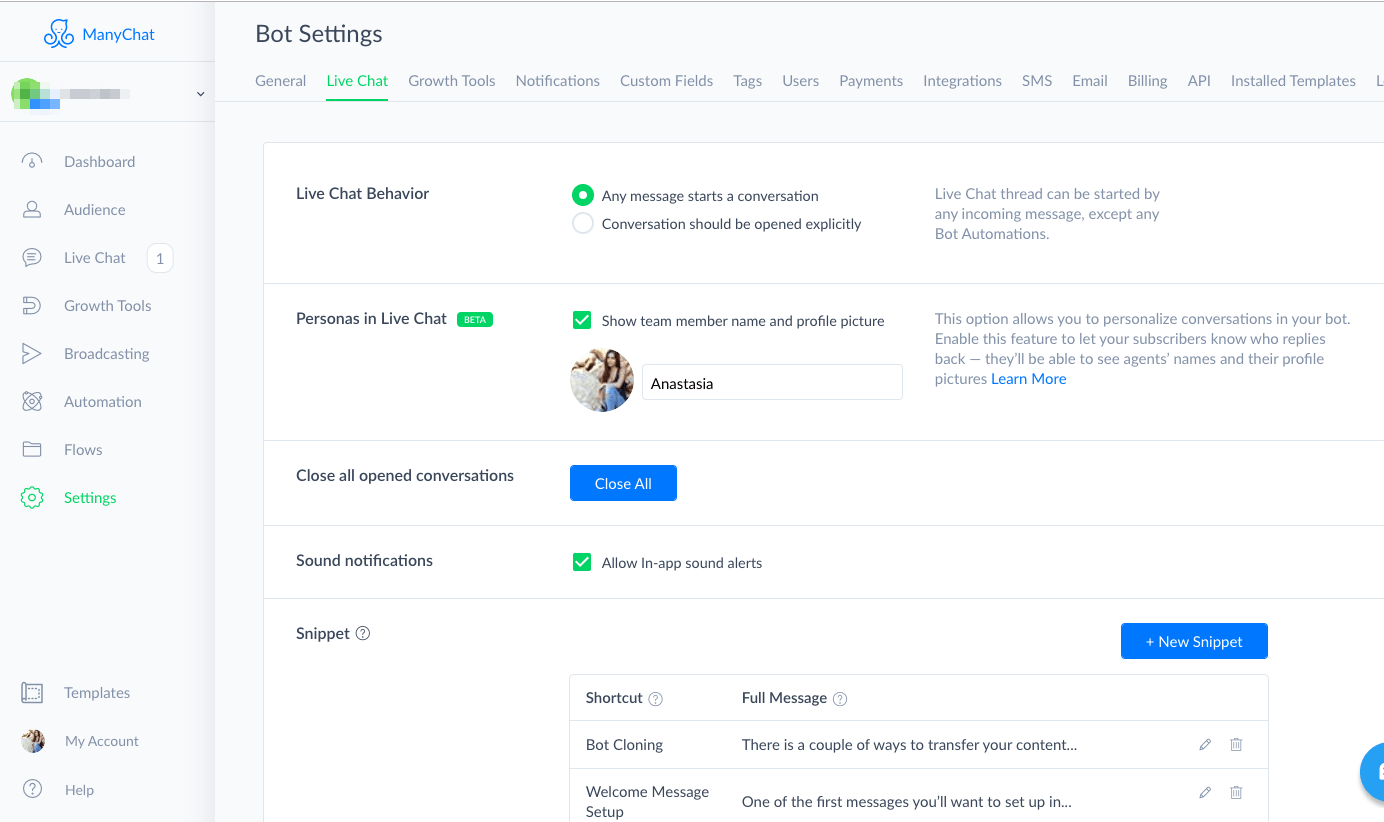
If you choose the second option, the conversation will only open when the “Open Conversation” action is performed; otherwise, it will always be marked as “Completed.”
To do this, you need to add the “Notify Admin” and “Mark Conversation as Opened” actions at the desired points in the flow, so you will receive notifications about this action, and the conversation will appear in the “Opened” folder of your live chat.
Overview #
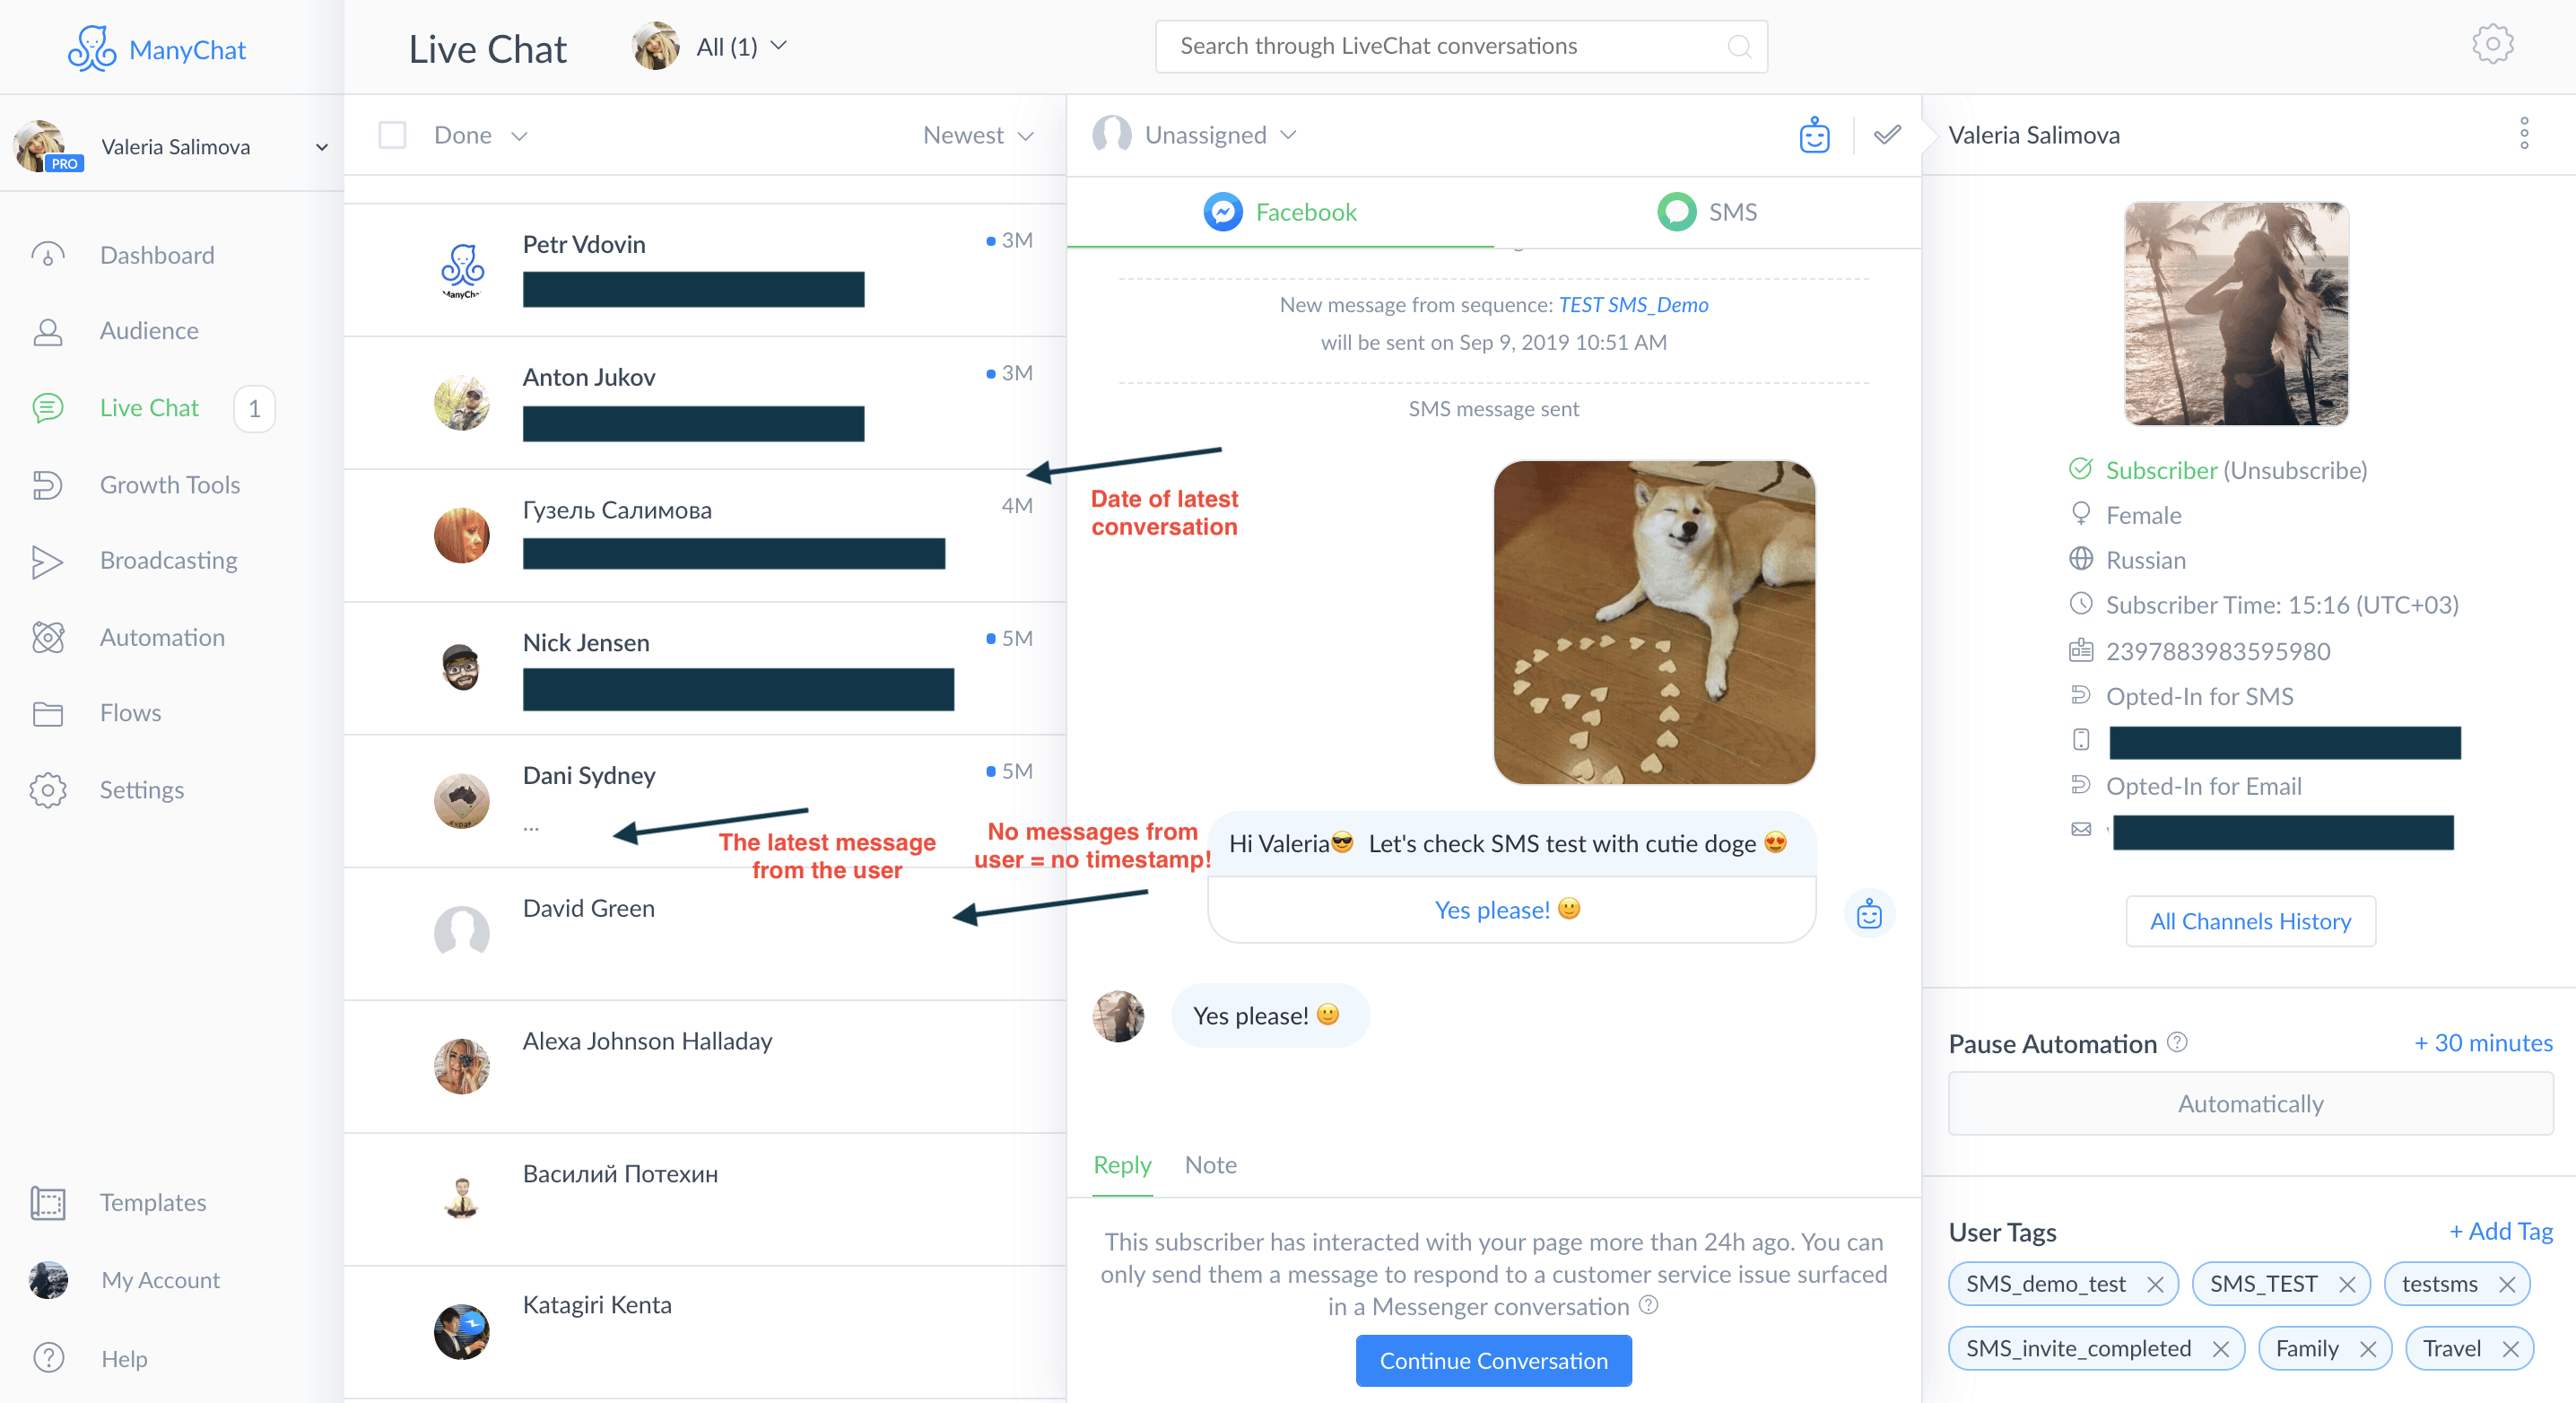
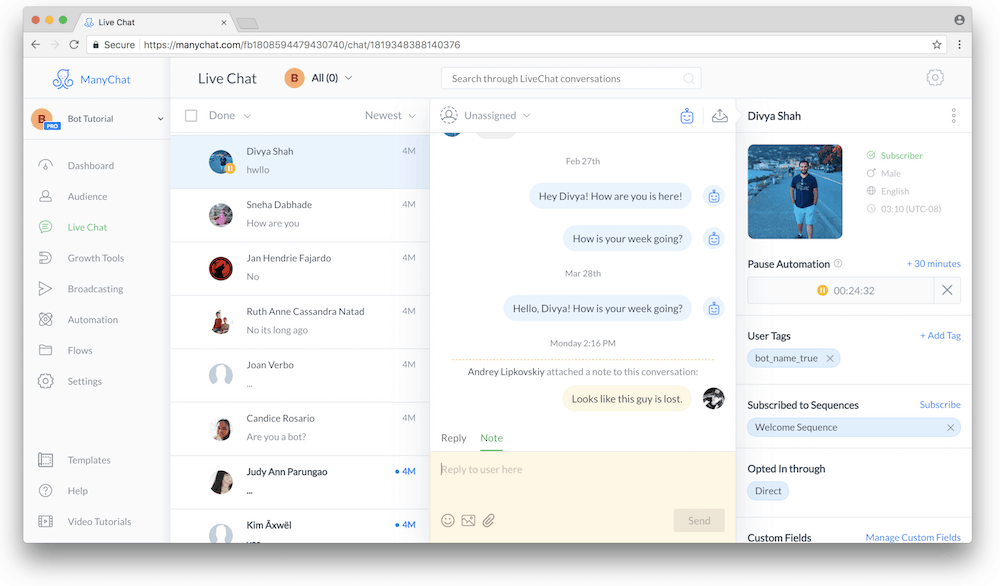
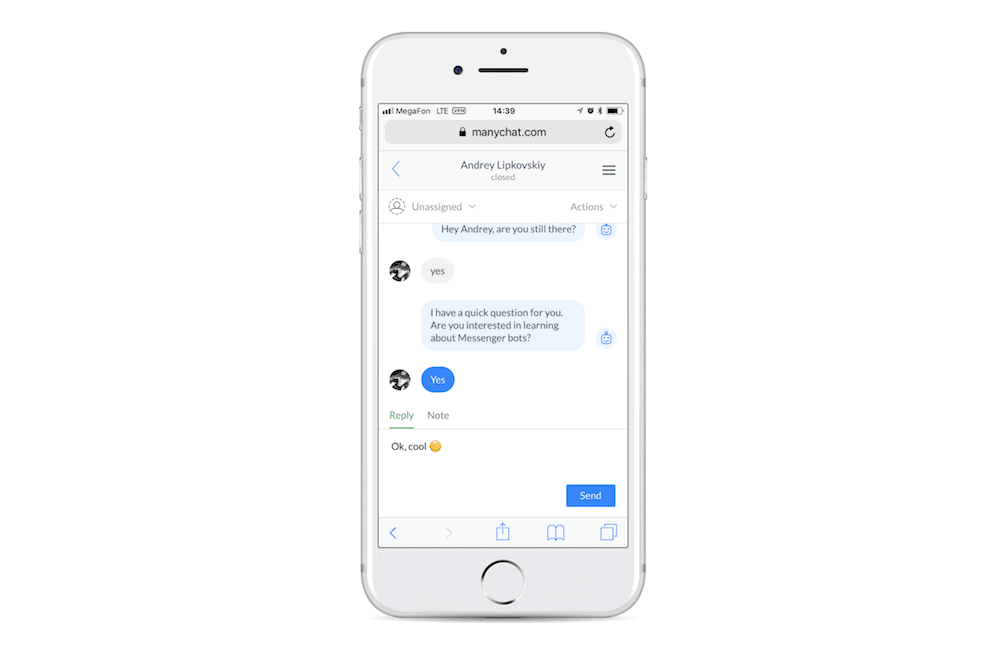
The live chat section consists of three columns: your subscriber list, all-channel conversations, and the user panel. The nearby page icon allows you to view assigned conversations (if a conversation is assigned to you, you will see your conversations along with your teammates' conversations).
You can switch between “Opened” and “Completed” conversations and sort them (newest/oldest) using the dropdown menu under the “Live Chat” title. Select the desired subscriber to view the conversation.
In the middle column, you will find the conversation itself. You can assign it to someone and reopen it after closing. Your bot messages are marked with a bot icon and can be hidden via the icon at the top. This allows you to find all messages sent by the page admin.
In the right column (user panel), you can view all the information your bot has collected from past conversations, allowing you to:
- View user information (profile picture, full name, status, gender, language, timezone)
- View the history across all channels (Messenger & SMS)
- Manage tags
- Subscribe and unsubscribe from sequences
- See how this subscriber chose to opt-in
- Manage custom user field values
- Unsubscribe this user, download, and delete their data
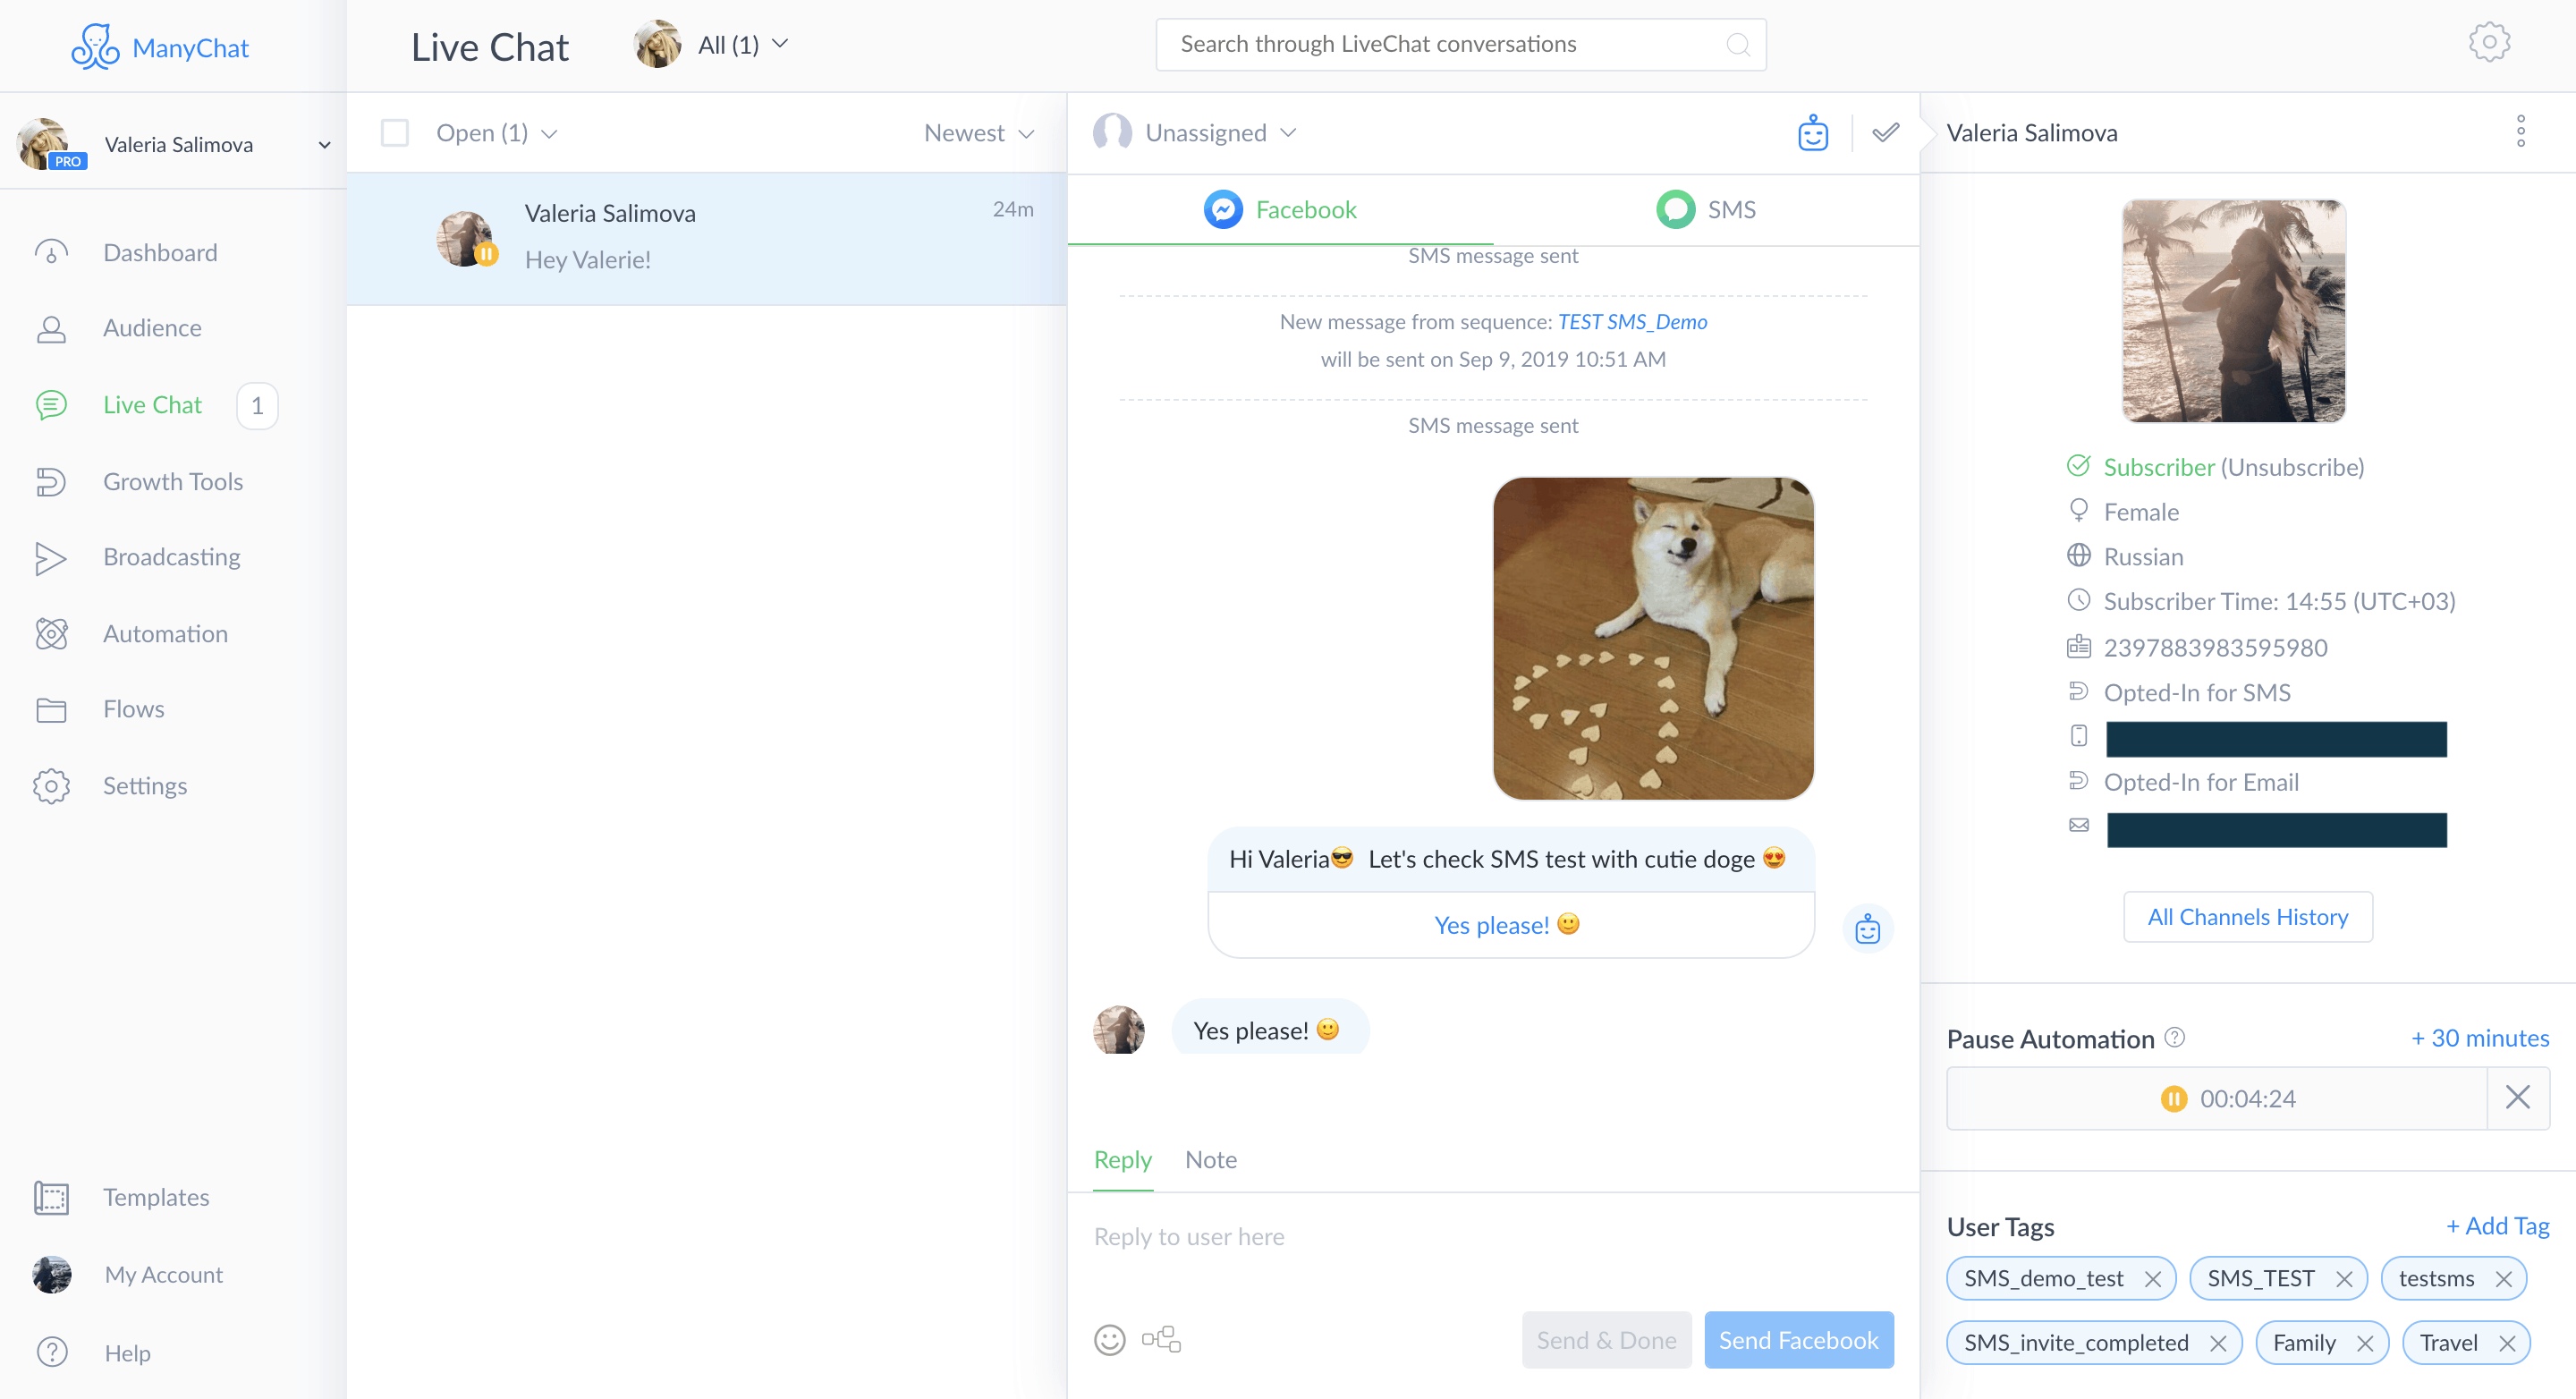
Please note: If you have enabled the SMS channel in settings, and your specific subscriber has a phone number (in the system field) and has taken the “SMS opt-in” action, you will be able to see SMS chats. The SMS feature is paid: outgoing SMS $0.01 (incoming messages are free).
By default, the topics are displayed based on the time of the last message from the user - you will find the latest conversations and recent activities at the top, while earlier conversations will be below. Each time you reply to a user, the conversation will automatically move to the top of the list.
The timestamp indicates the time of the last message manually sent by the user. If the user has not written anything on the page and only clicks a button in the bot flow - there will be no timestamp at all. These conversations will be displayed under the conversations where the user manually interacted:
operation #
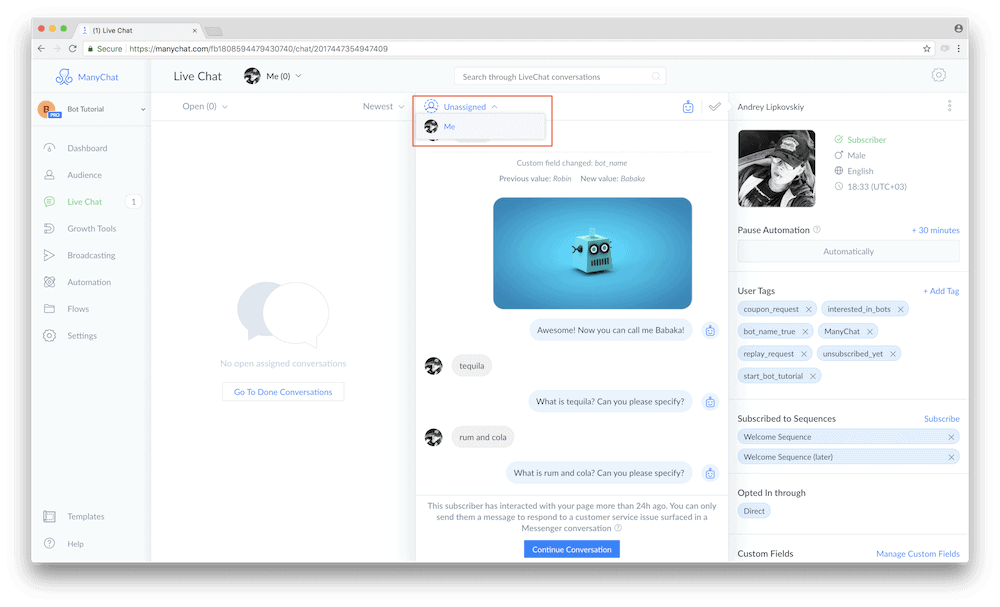
Use the dropdown menu as shown below to assign the conversation to yourself or one of your teammates (unassign the conversation using the same directory). You can track all assignments in the dropdown menu next to the “Section” title in the upper left corner.
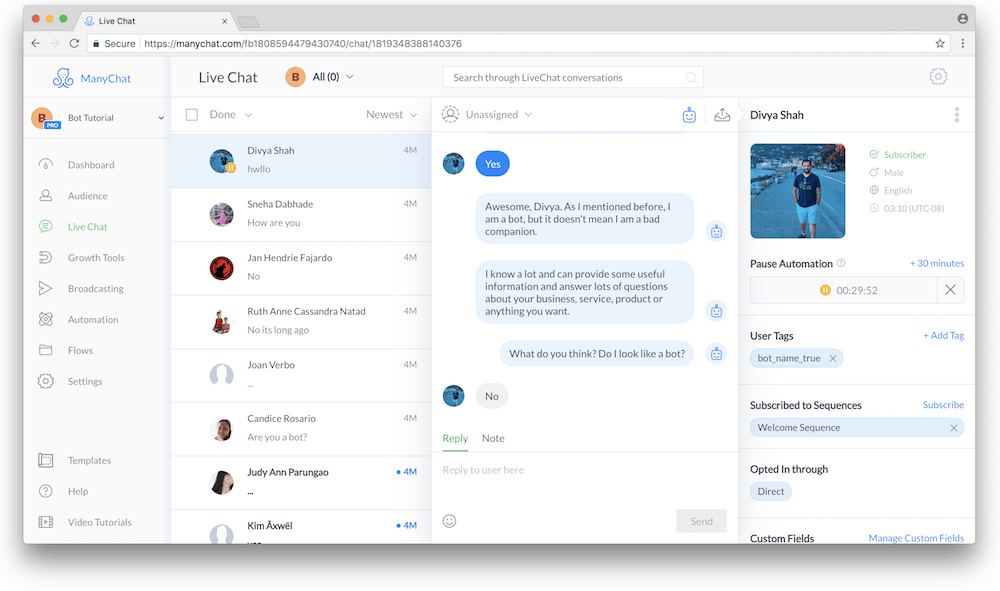
Pause automation #
With this option, you can stop all bot messages while communicating with subscribers. When you send them a message, a 30-minute pause will be activated, and your subscribers will only receive messages manually sent by the admin for 30 minutes. During this period, keywords will not be triggered. When the pause feature is on, you will see a pause icon on the subscriber's profile picture in the conversation list, and you can increase or disable the pause time at any time in the user panel.
Additionally, after enabling “Pause,” if the user is in a flow at that time, all messages will be sent to the end of the flow or the nearest interruption: for example, delay or smart delay.
If “Delay” was activated during the “Pause Automation” period or even before, messages after the “Delay” will only be sent when the “Pause Automation” ends.
Important note: Even if you cancel the pause automation earlier, messages will only be sent 30 minutes after PA is activated. If PA is active at the end of this 30 minutes, messages will wait another 30 minutes and then repeatedly attempt until PA ends.
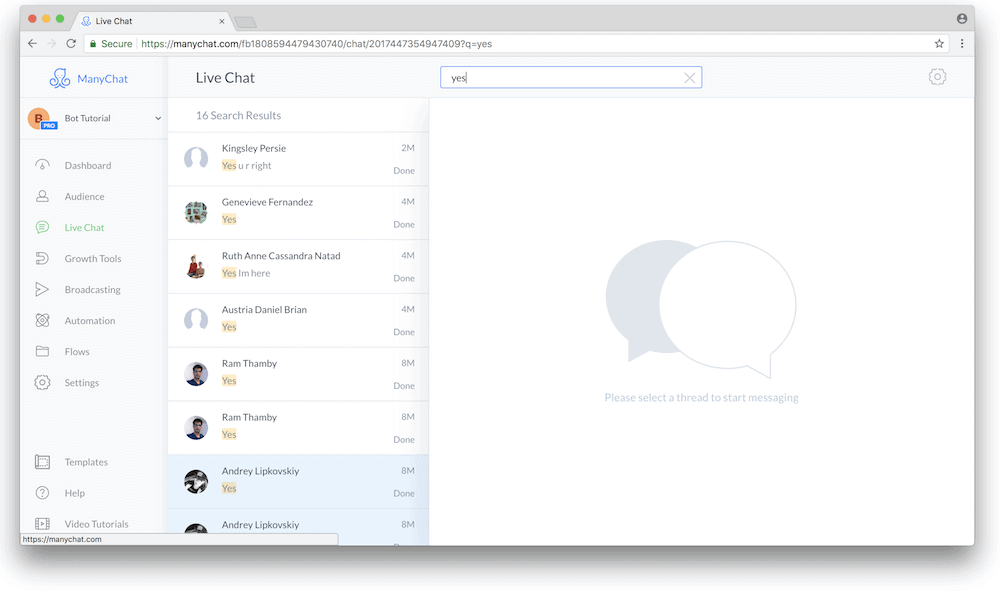
search for #
Thousands of threads are not a problem; you can search all conversations and jump into the desired message to see details. Two symbols are enough to start a search. Unfortunately, special symbols are not included (you will not be able to use $, &, %, etc.).
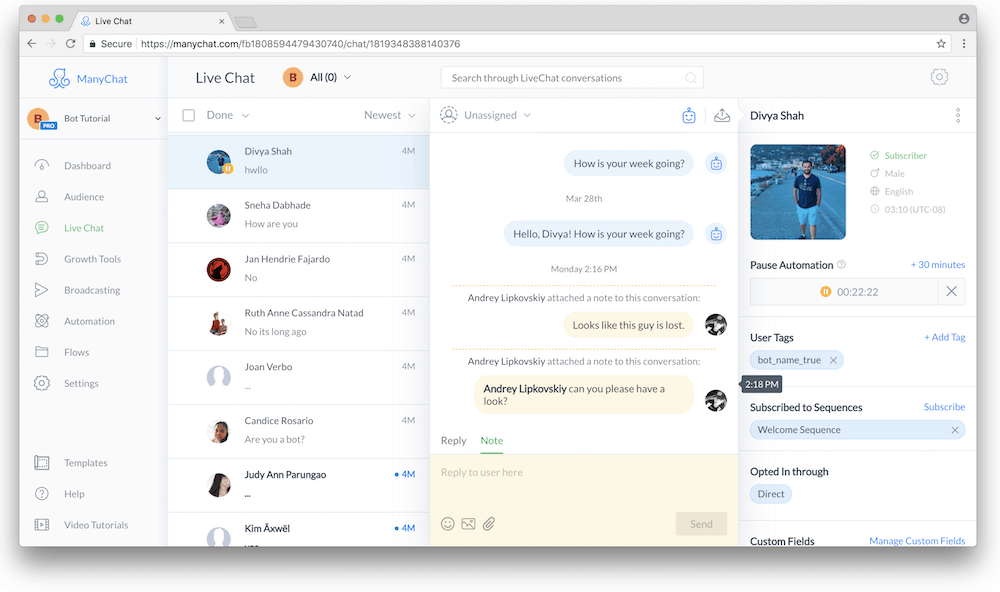
notes #
Comments can help you manually tag subscribers, add descriptions, and other notes to share certain information among team members or add some explanations/reminders for yourself. Use the “Comments” tab to add some information. Only page admins can see comments.
Mentions in live chat notes #
Simply type @ in the “Live Chat Notes” section to mention one of your team members and notify them. If you are the only admin, you can mention yourself at any time to receive reminders in Messenger.
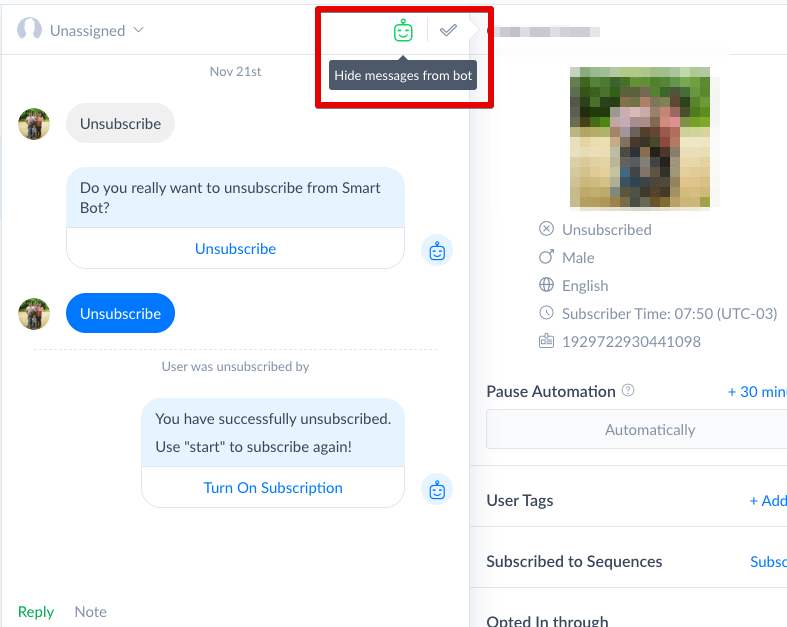
Hide messages from bots #
This feature hides all automated messages in the conversation, so you can focus only on the messages that subscribers manually type on the page.
Note: The “Hide messages from the bot” feature will also hide keywords and button clicks from subscribers. This happens because such messages are also part of automation.
Sending process #
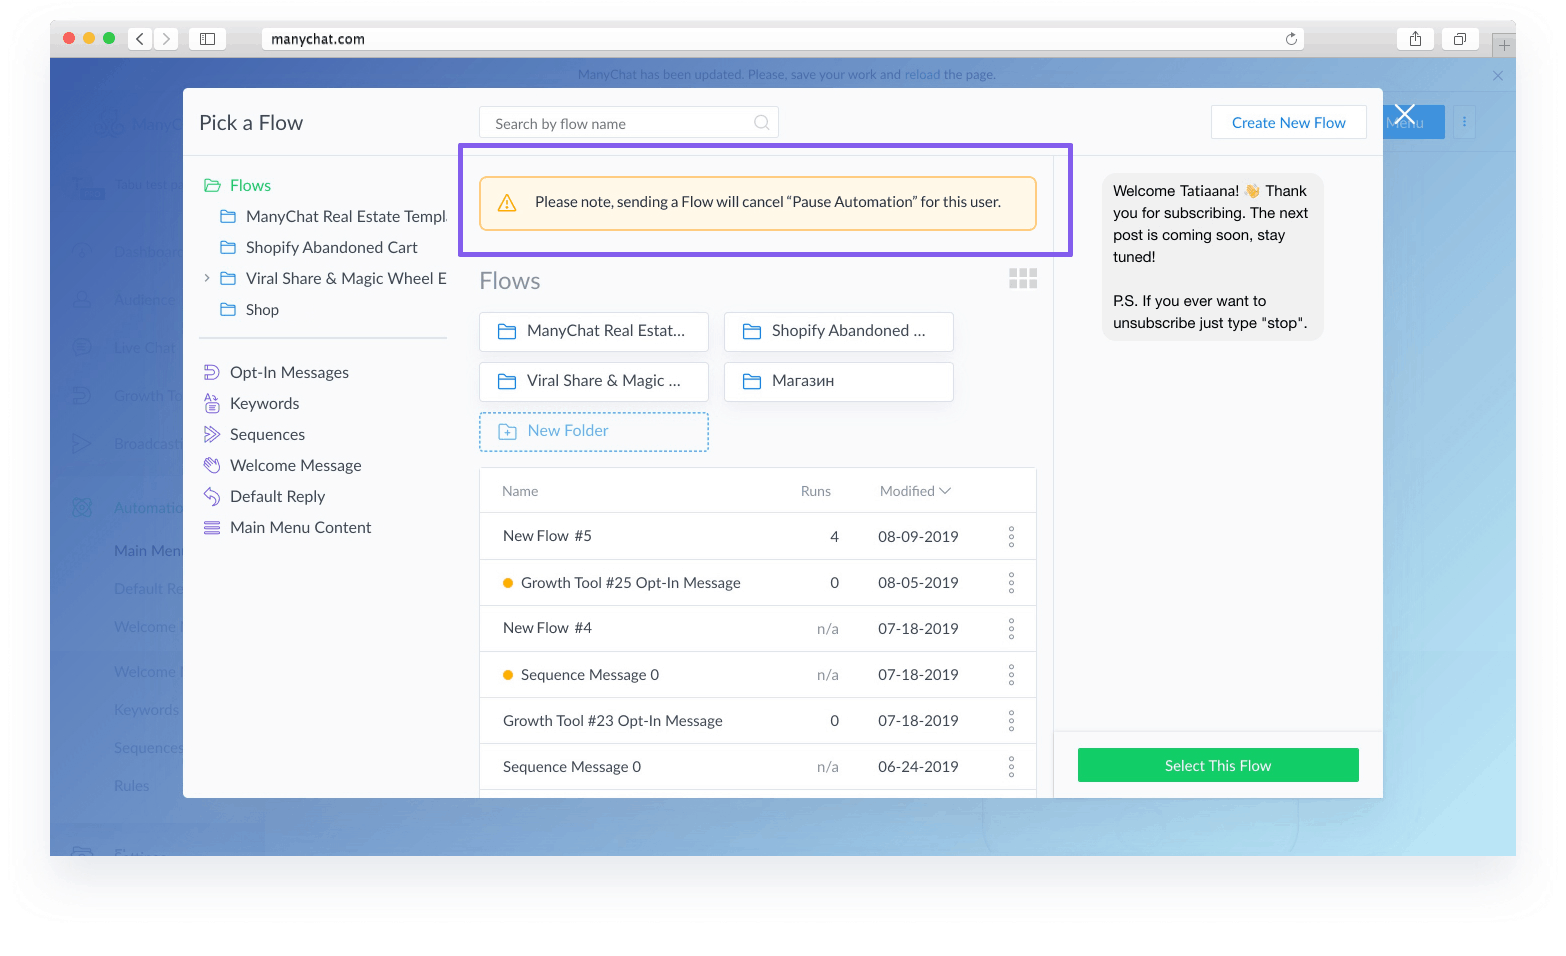
This feature allows you to send a specific flow to subscribers without creating additional automations. To do this, simply click the “Send Flow” icon at the bottom of the conversation, select a flow, and then click “Send this flow”:
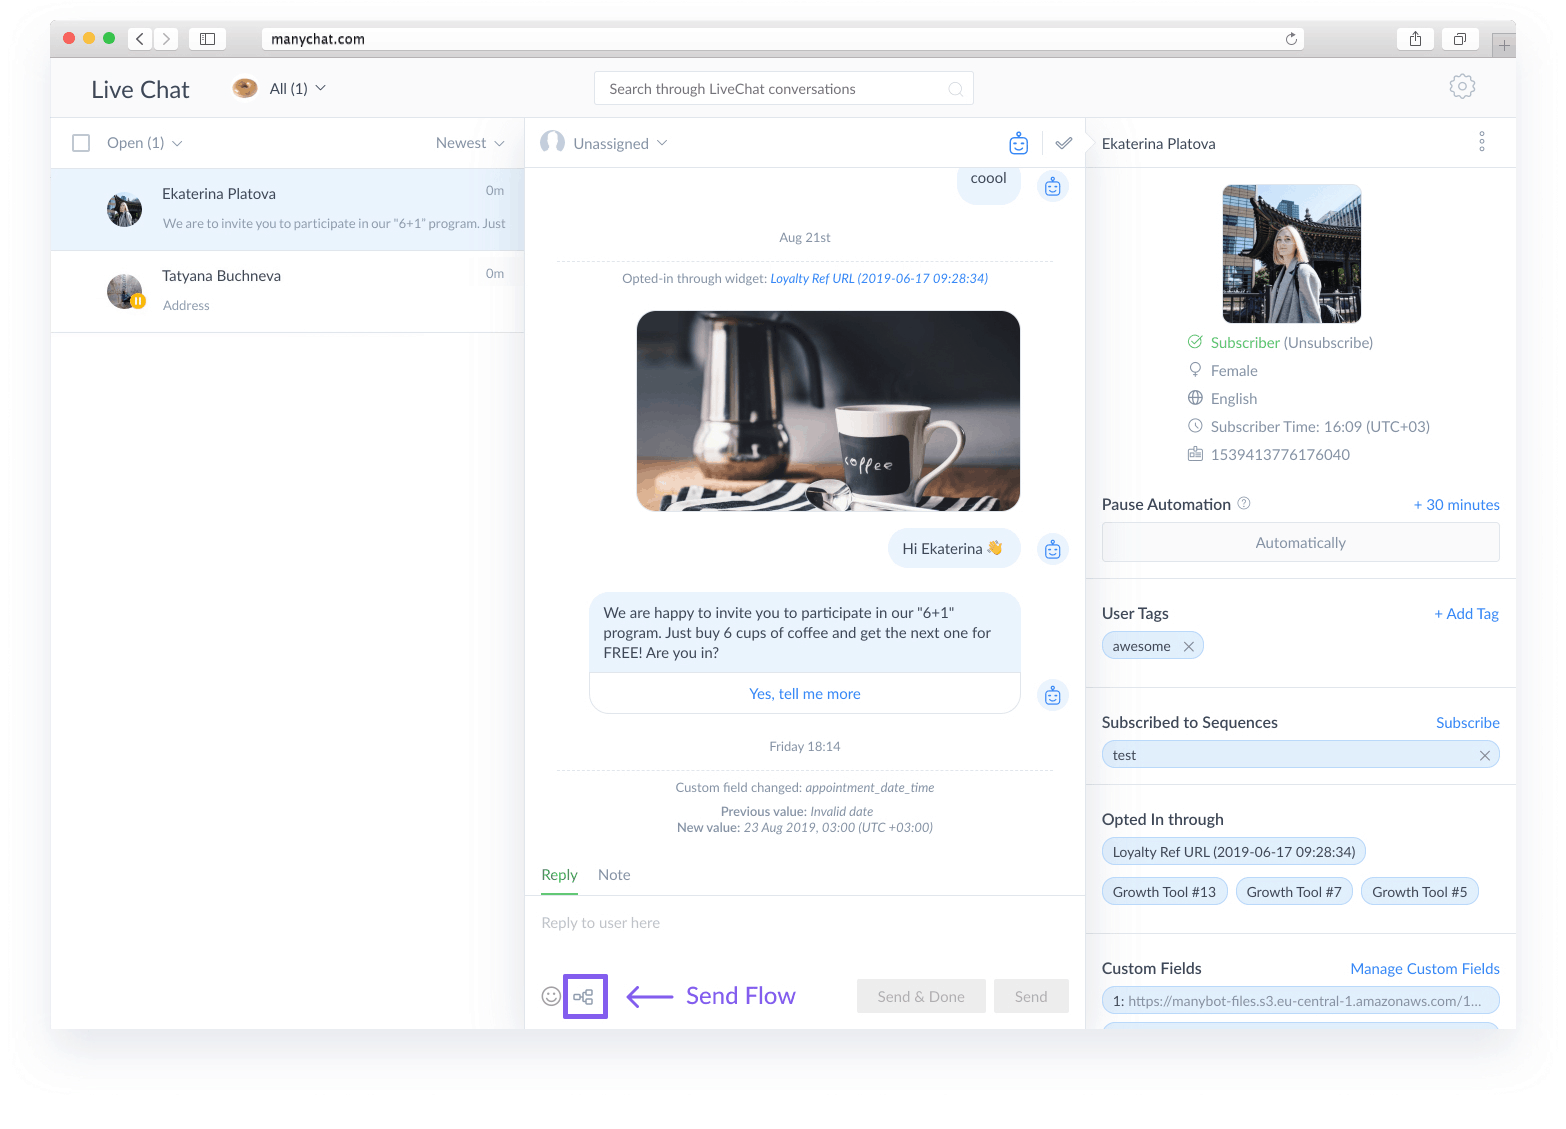
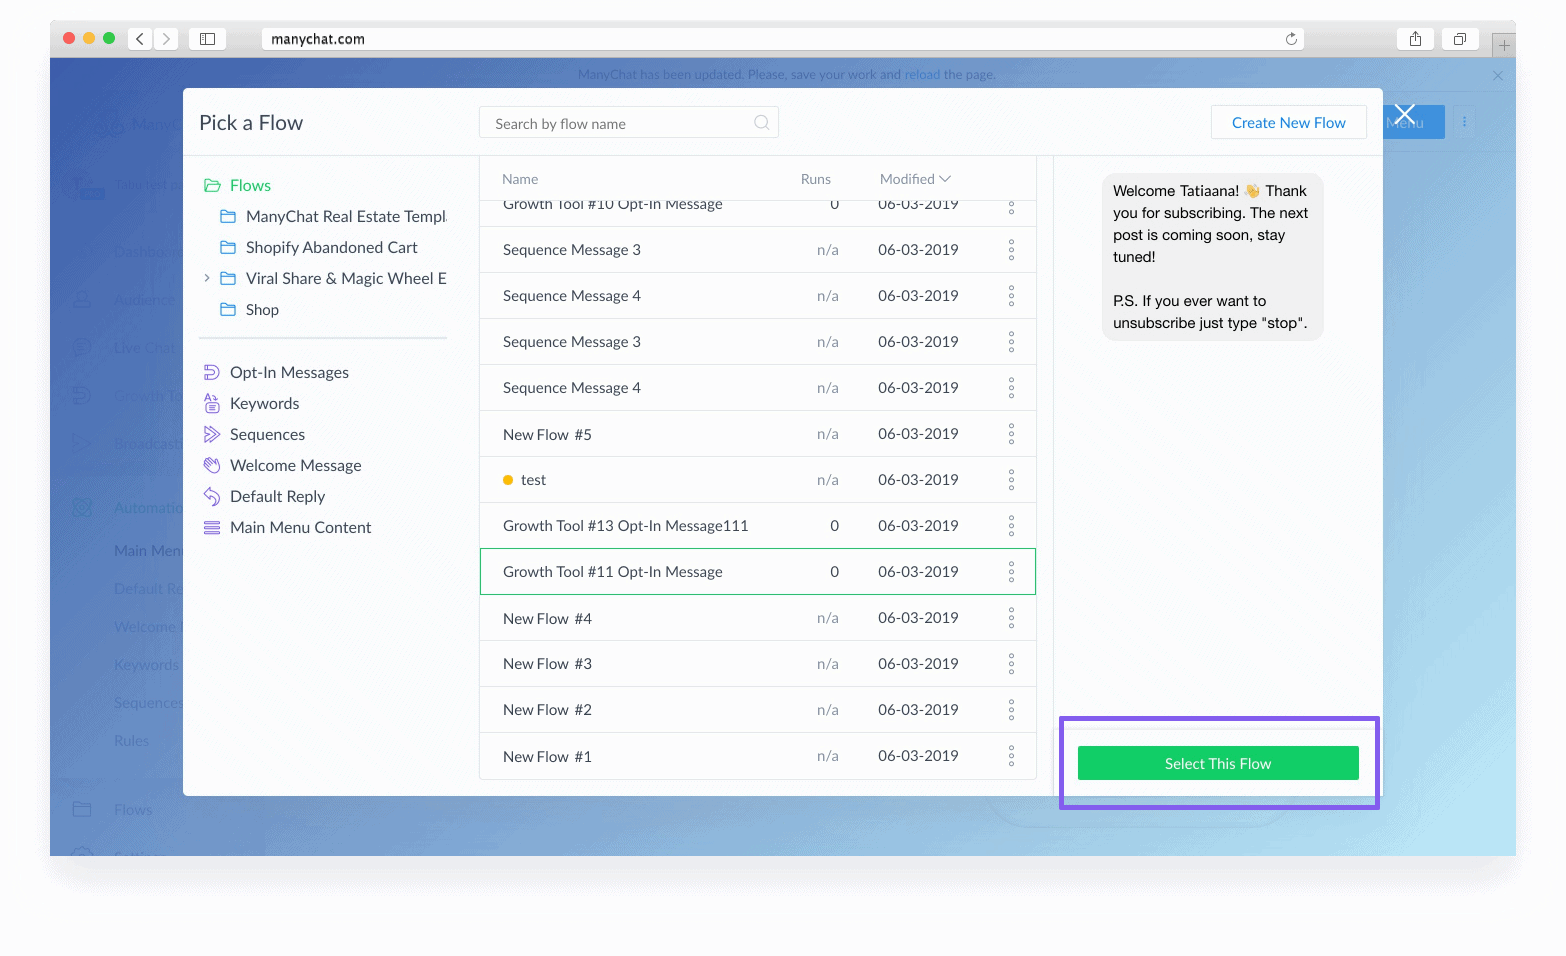
After sending the flow, you will see a “Flow Sent” system message in the subscriber's conversation, which includes the name of the flow:
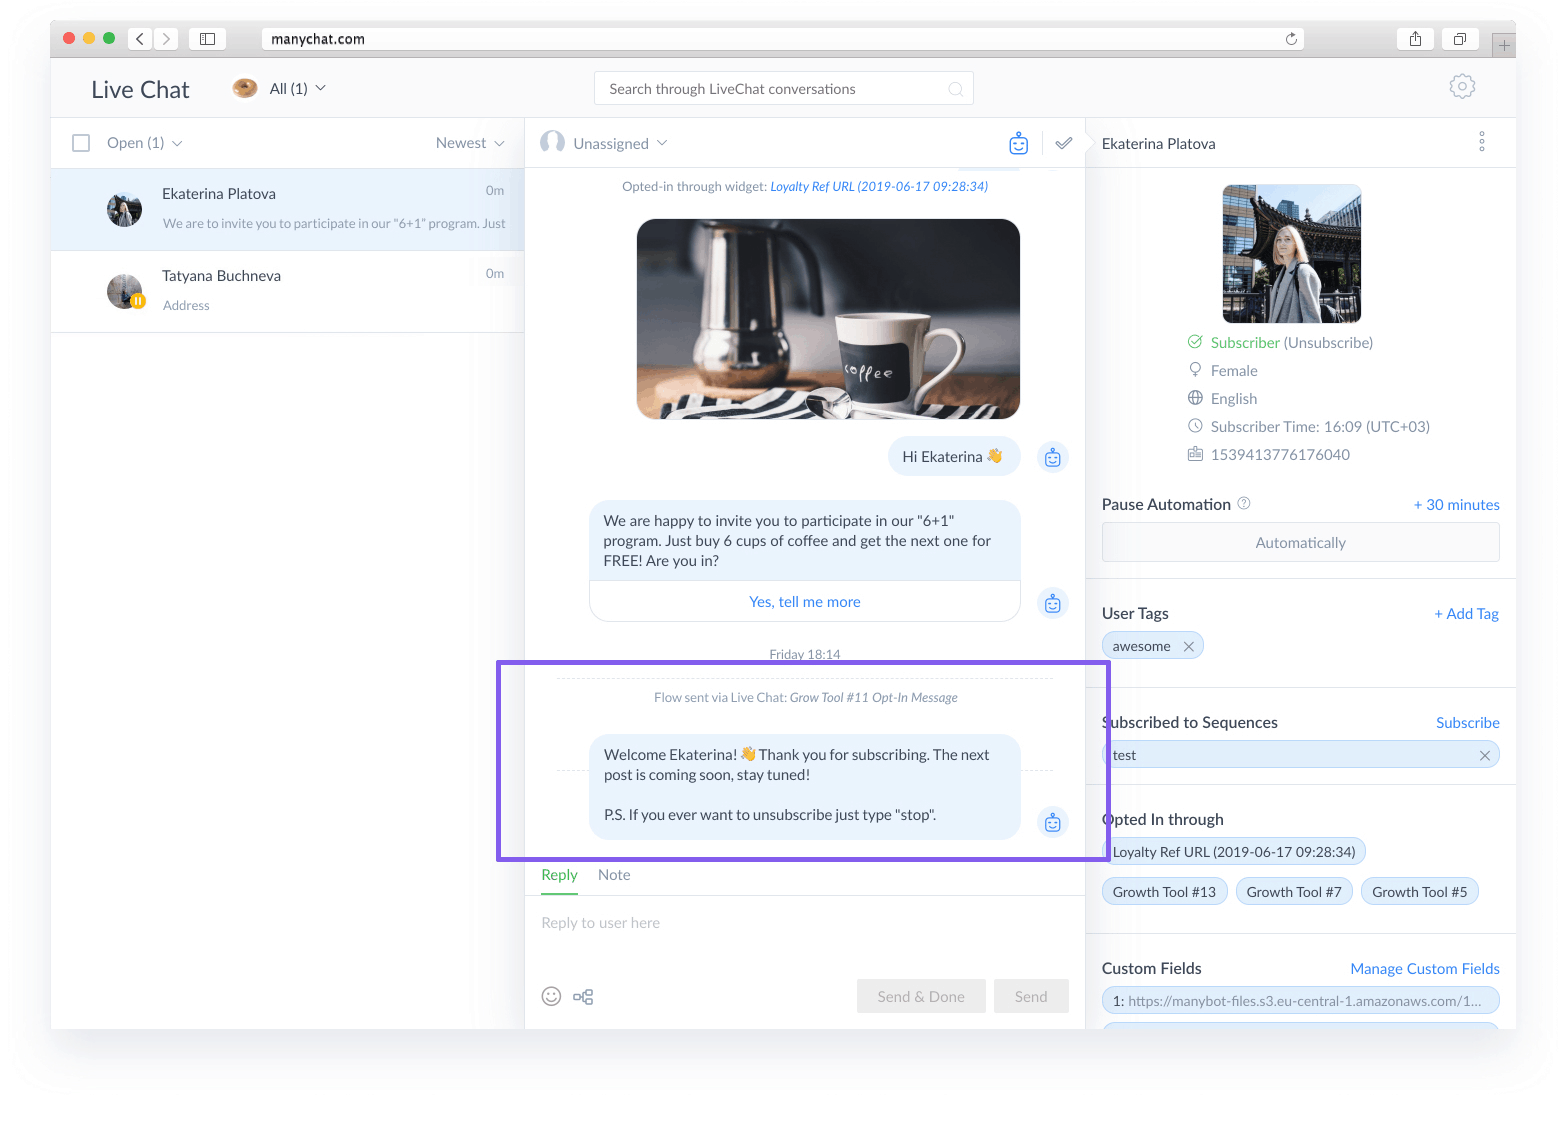
Note: If “Pause Automation” is enabled, it will automatically be disabled after sending the Flow:
Content type #
Now, your messages can have content type labels that match. This way, you can use non-promotional (post-purchase updates, confirmed event updates, account updates), promotional, or OTN content labels to attract users. This allows you to send messages to people outside the 7-day messaging window who may not have received promotional or OTN content. The 7-day messaging window allows you to send messages to others via live chat, but once that window expires (i.e., the user has not interacted with your bot in any way after 7 days), you can only send them non-promotional or OTN content type messages.
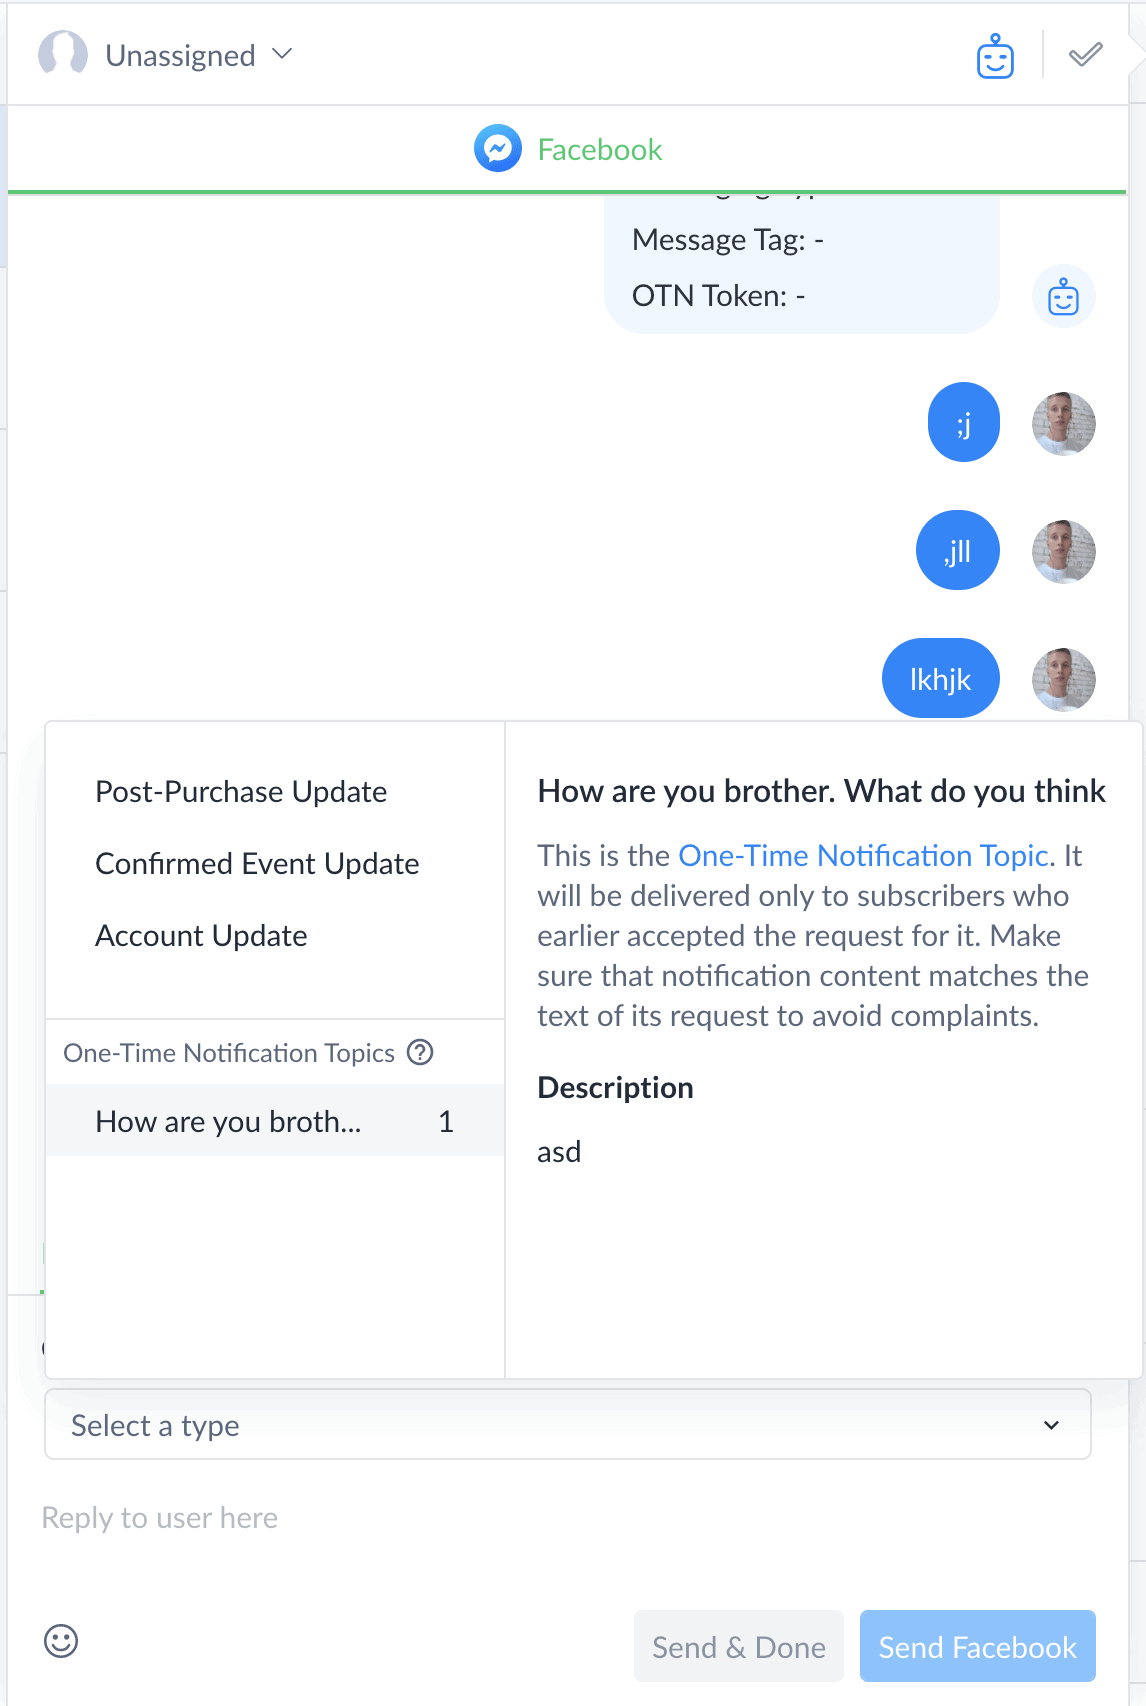
You can also send one-time notifications to users who agreed to receive the notification but ultimately could not receive it through automation.
relatedContent typewithOne-time notificationFor more information, please see the linked article.
Action support
Mobile devices support real-time chat, which means you can manage conversations almost in the browser on your mobile device. Access on mobile devicesmanychat.comto manage conversations.
You can alsoHeredownload the iOS version of the ManyChat app – it can not only handle real-time chat conversations but also manage subscriber data such as tags, sequences, custom field values, etc. More features are in development!
The Android app is in development - we will provide more information as soon as possible!
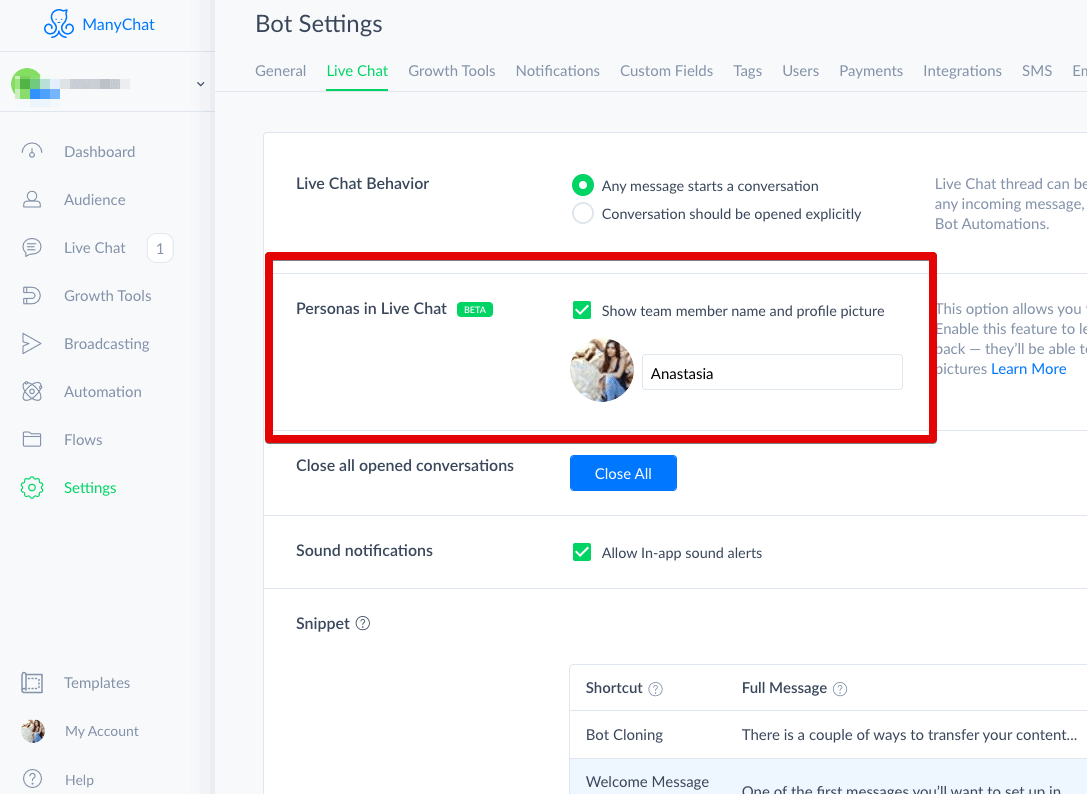
Roles #
This feature allows you to personalize conversations in the bot. Enabling it in “Settings” lets your subscribers know who replied to your message - once activated, your subscribers can see the agent's name and their profile picture, which will be automatically filled from Facebook.
This is useful for various use cases (e.g., customer service) (especially when you have multiple team members collaborating). Roles will help you make conversations more transparent and build a better customer experience.
Snippet #
Snippets are pre-filled answers that you can send to subscribers in real-time chat with just one click. This is ideal for answering frequently asked questions that you have already responded to and do not want to spend time typing the same information over and over again.
To set up a snippet, go to Settings => Online Chat, and then scroll down to the bottom of the page until you see the “Snippets” section. In there, click “+ New Snippet”; you must specify a “Shortcut” (which is also the name of your snippet) as well as the text of the snippet itself. Of course, you can edit the snippet here later.
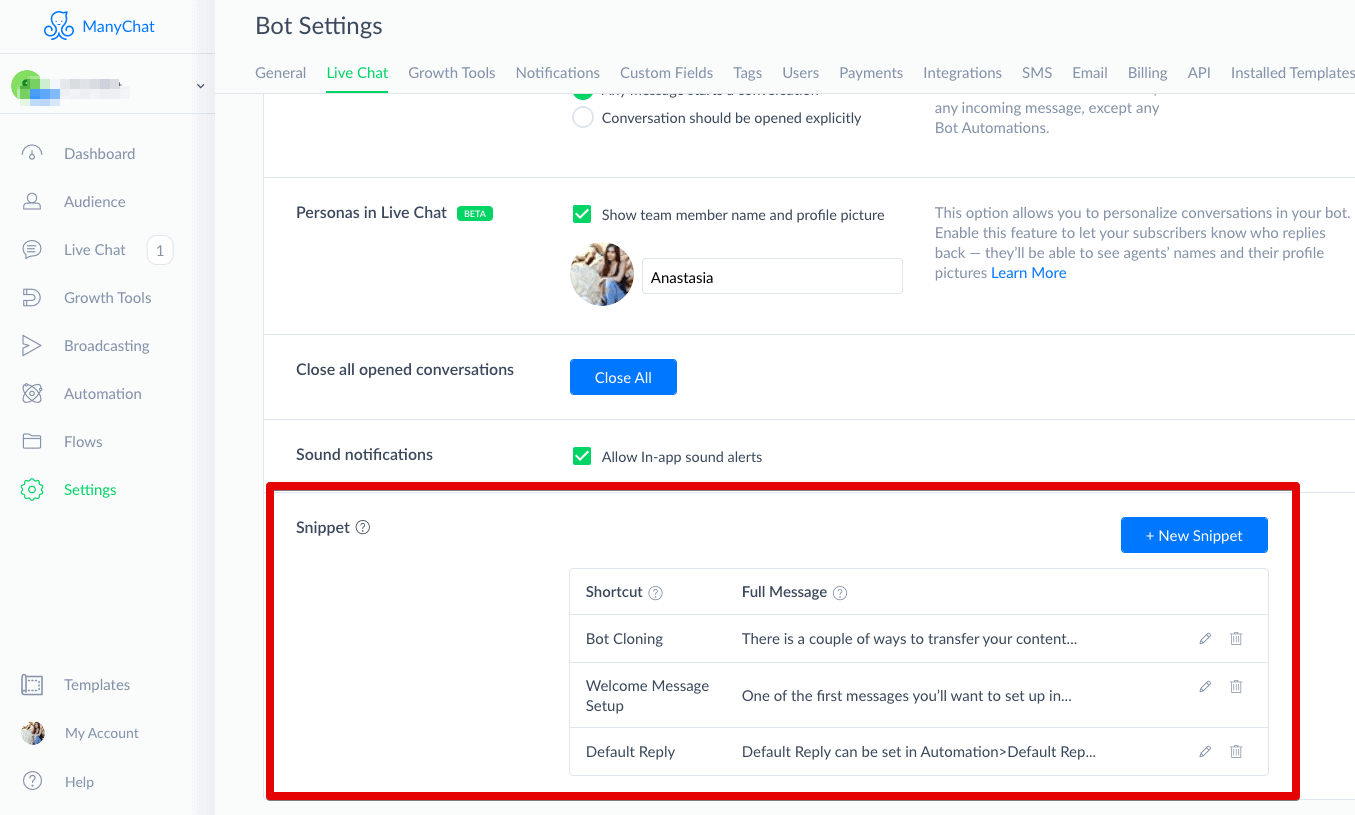
After creating a snippet, you will see them in your conversations with subscribers. Just click on the desired snippet, and its content will be automatically added to the text input field. Now all you have to do is click “Send”! :)


