ManyChat Flows Manager is the main storage for all flows, allowing you to view, edit, and manage them. Let's learn how to do it.
Overview #
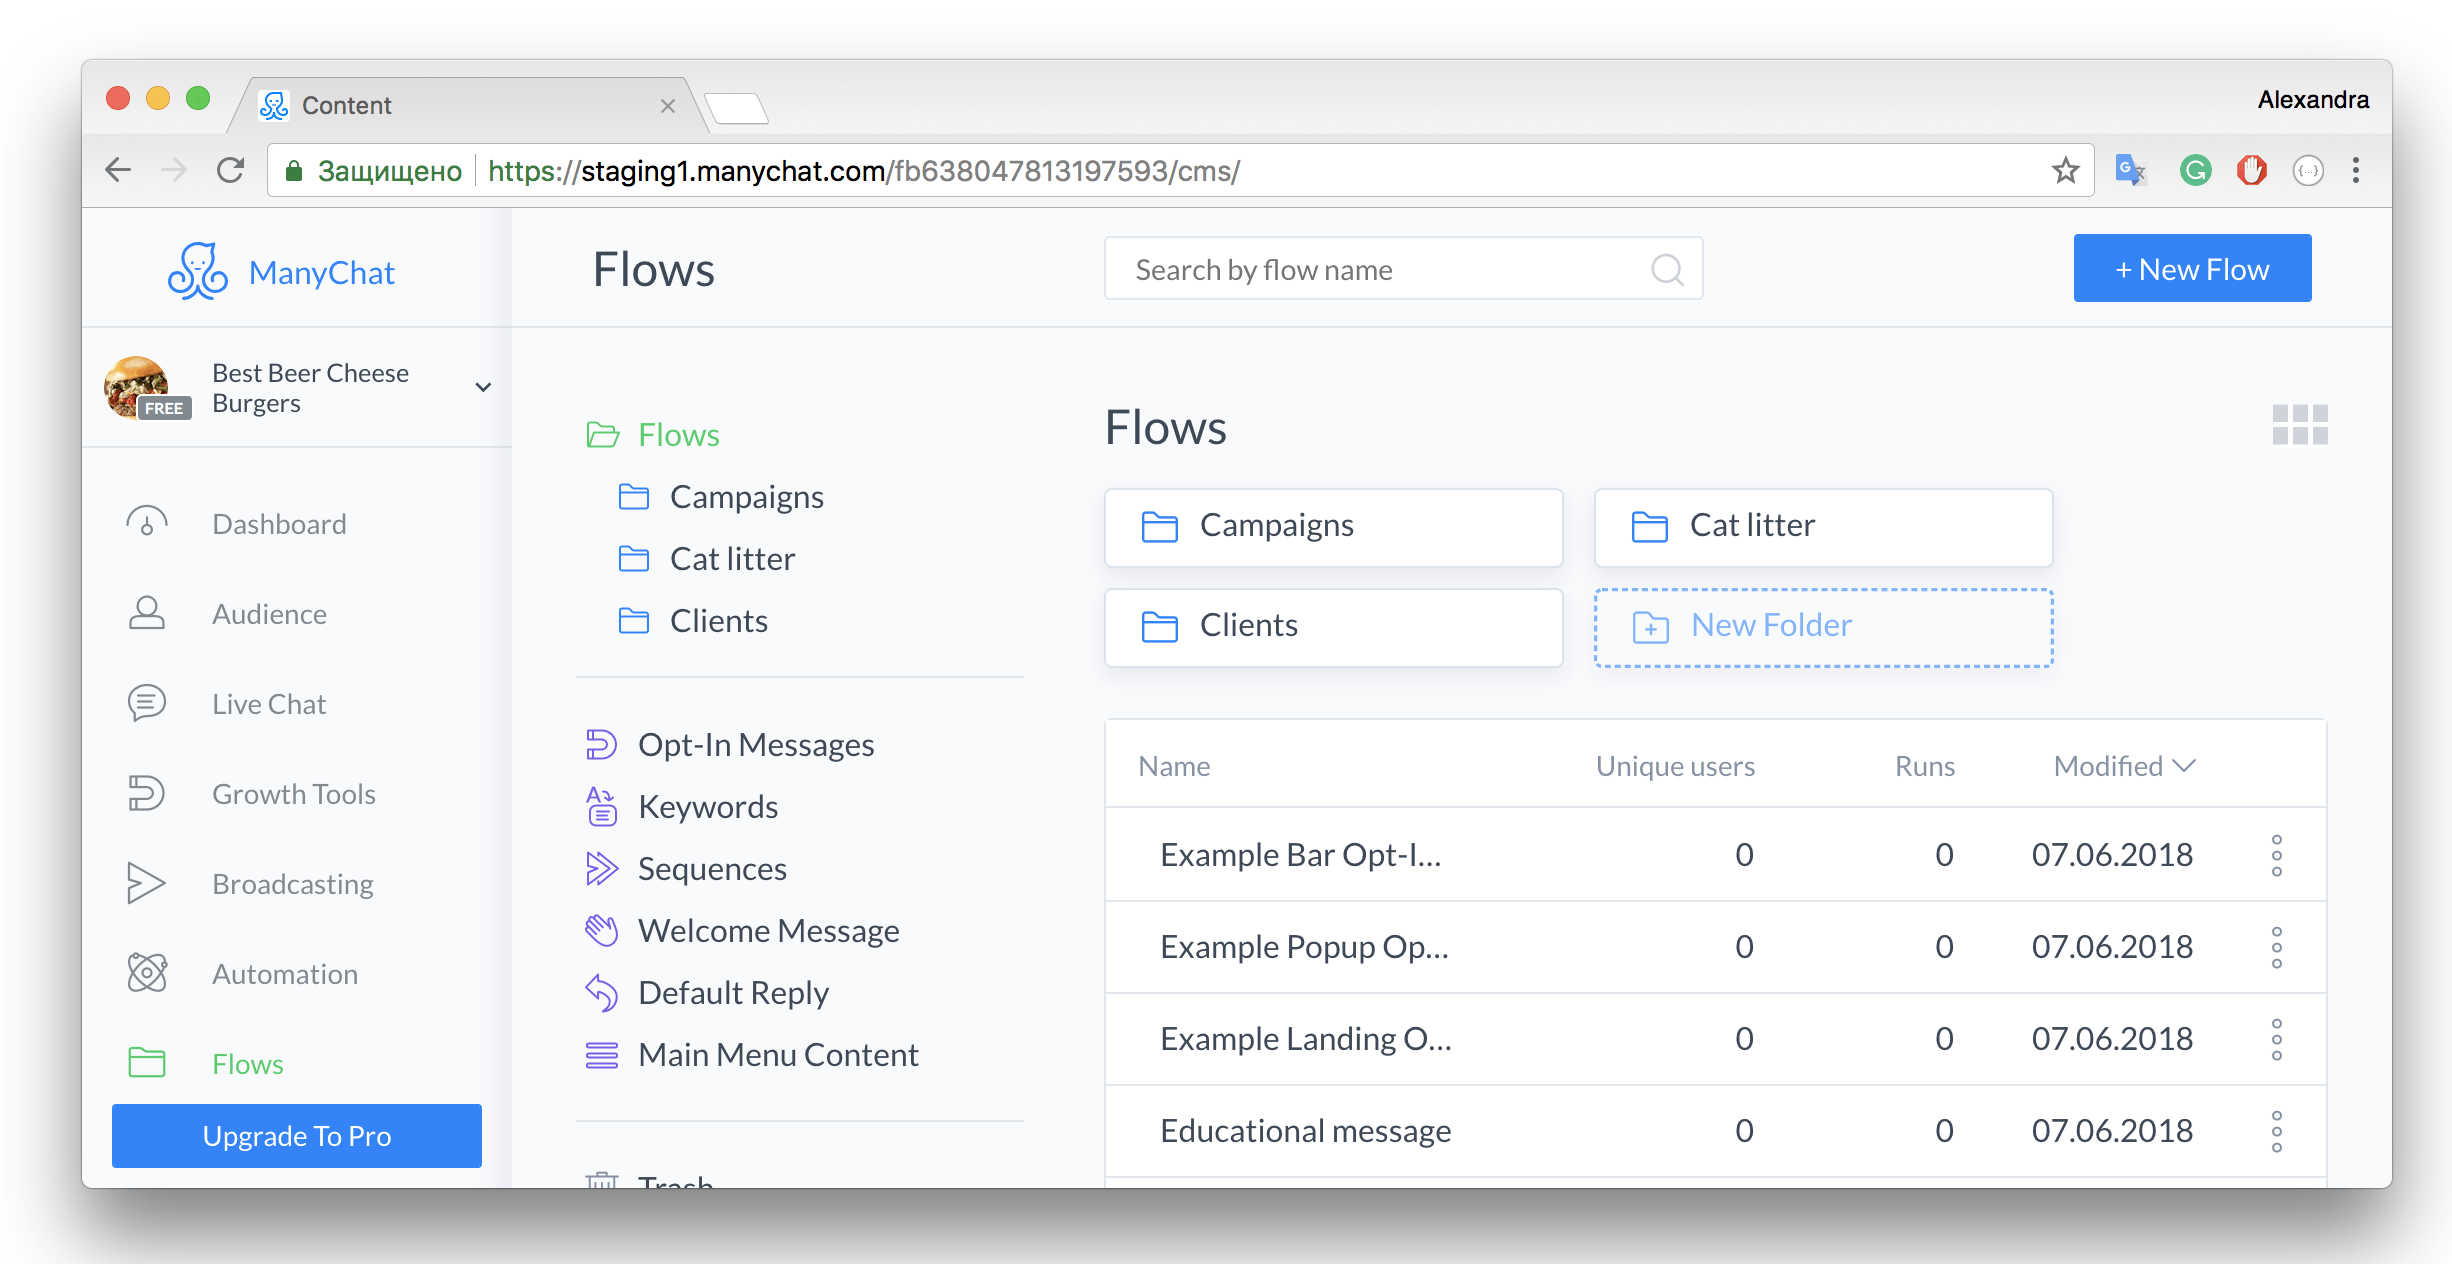
This is the main element of the Flow Manager.

1. Search for flows by name.
2. Create a new flow.
3. The toggle view button allows you to switch between flow views.
4. Folders help you organize flows.
5. Smart folders store your current bot automations.
6. Your flows along with statistics and other information.
7. The “Actions” button allows you to perform actions on the flow.
Switch view #
Click the toggle view button to switch between list and thumbnail views.
Action overview #
Click the button with three dots to open the context menu, which allows you to perform actions on the flow.
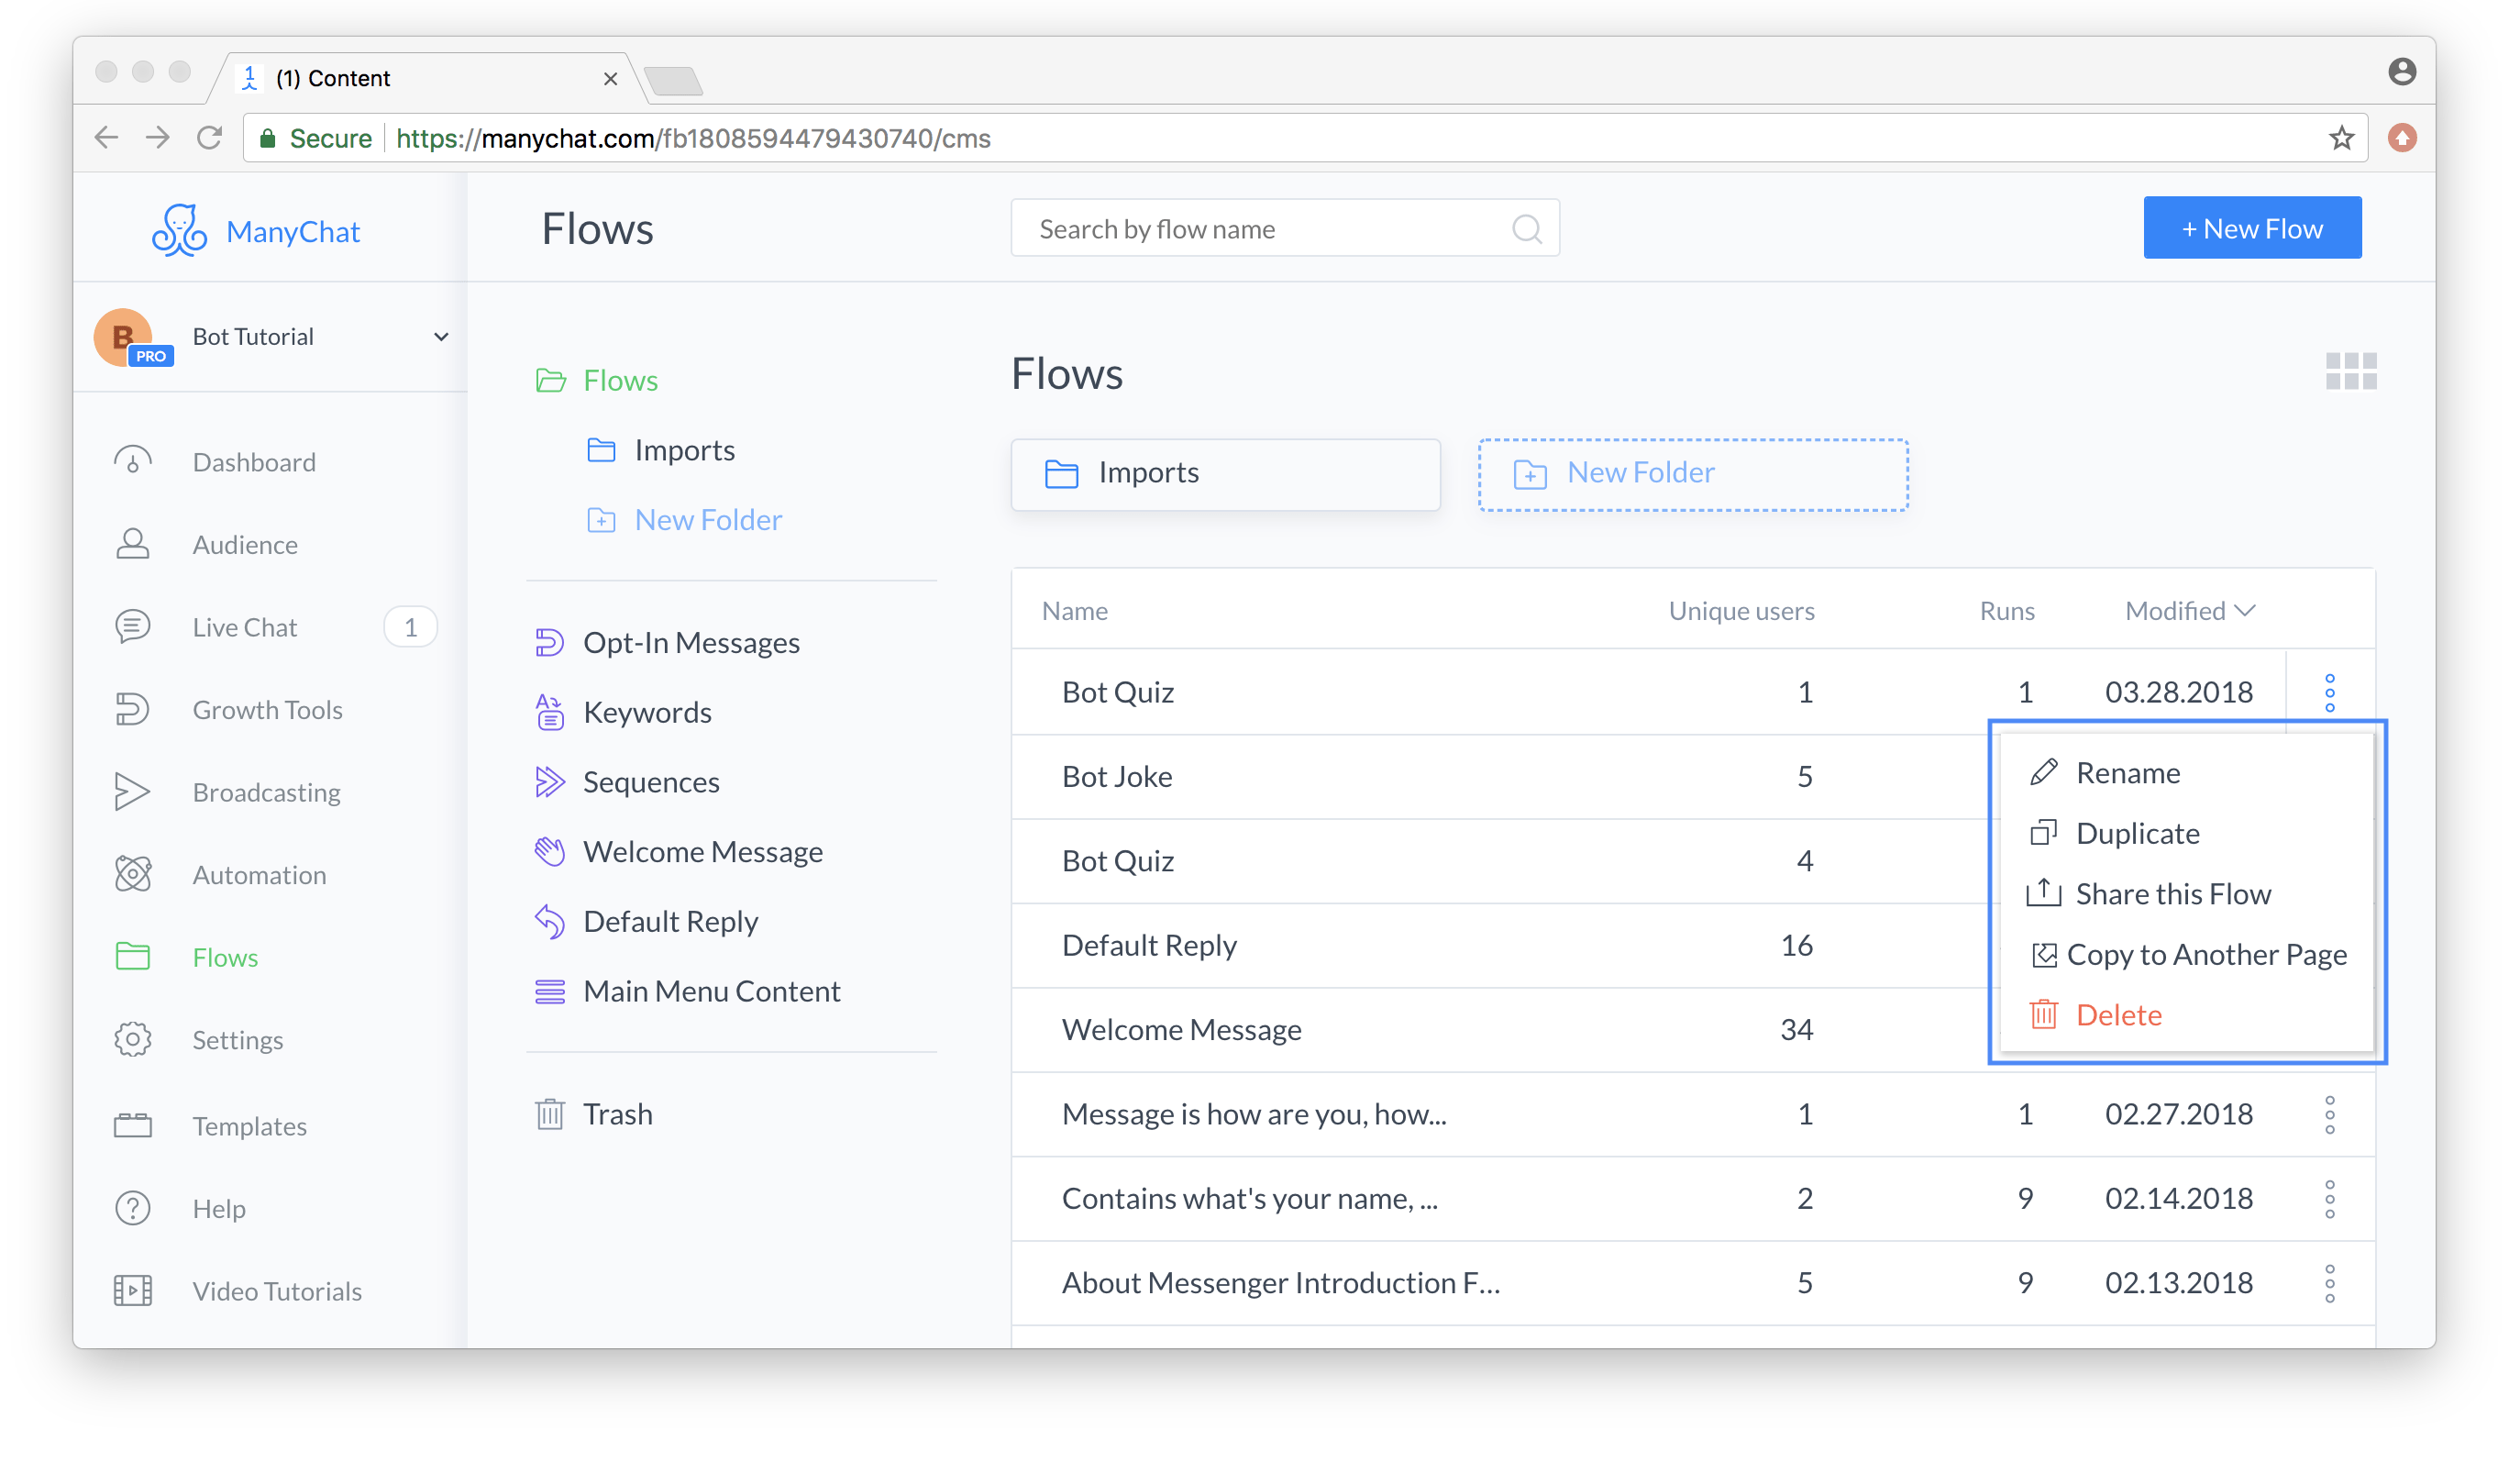
The context menu allows you to perform the following actions:
– Rename.Change name.
– Duplicate.Copy your flow to the same folder.
– Share this flow.Share the flow as an image, or share a link to an interactive flow that can be previewed in Messenger.
– Copy to another page.Copy this flow to another page you manage.
– Delete.Move this flow to the trash.
Rename, copy, move to trash, and delete from trash.
These are self-evident; just take some time to play with renaming, copying, and moving to the trash (you can always restore deleted flows from the trash unless you change their content, in which case the flow cannot be completely deleted).
To permanently delete a flow from the trash folder, open the trash, click the 3-dot menu -> select the “bin” icon and confirm the flow deletion.
Note:Permanent deletion means the flow will be permanently deleted and cannot be restored, so please use this feature with caution.
Runner #
Flow channels are small icons that indicate where the flow will send messages.
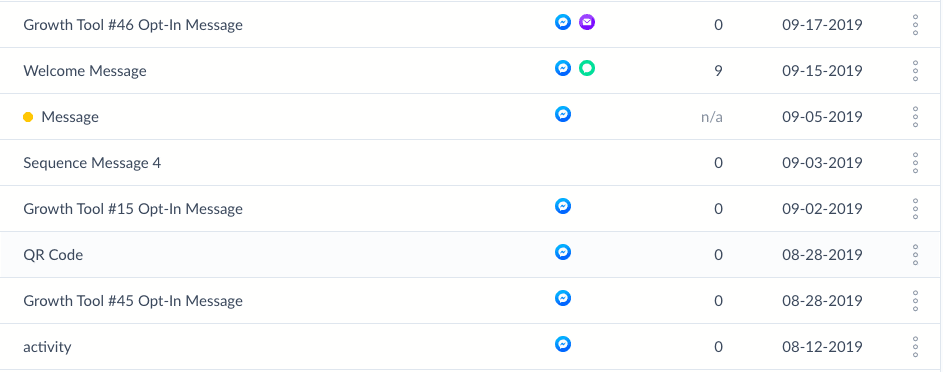
 The blue Messenger icon indicates that the user will receive messages via Messenger.
 The purple email icon indicates that there are some emails in the flow that will be sent to the user.
 The green SMS icon indicates that an SMS message will be received as long as the user submits his phone number.
Process sharing (share this process) #
The flow sharing feature allows you to share flows with clients or friendly bot builder communities. It allows you to export it as a PNG file or create an interactive Flow that can be previewed in any Messenger. You can also enable the feature to save shared flows to their ManyChat accounts.
Click on the context menu “ Share this flow” button. ClickDownload PNGbutton to get the image, or toggleEnable sharingswitch to get the link or embed code.
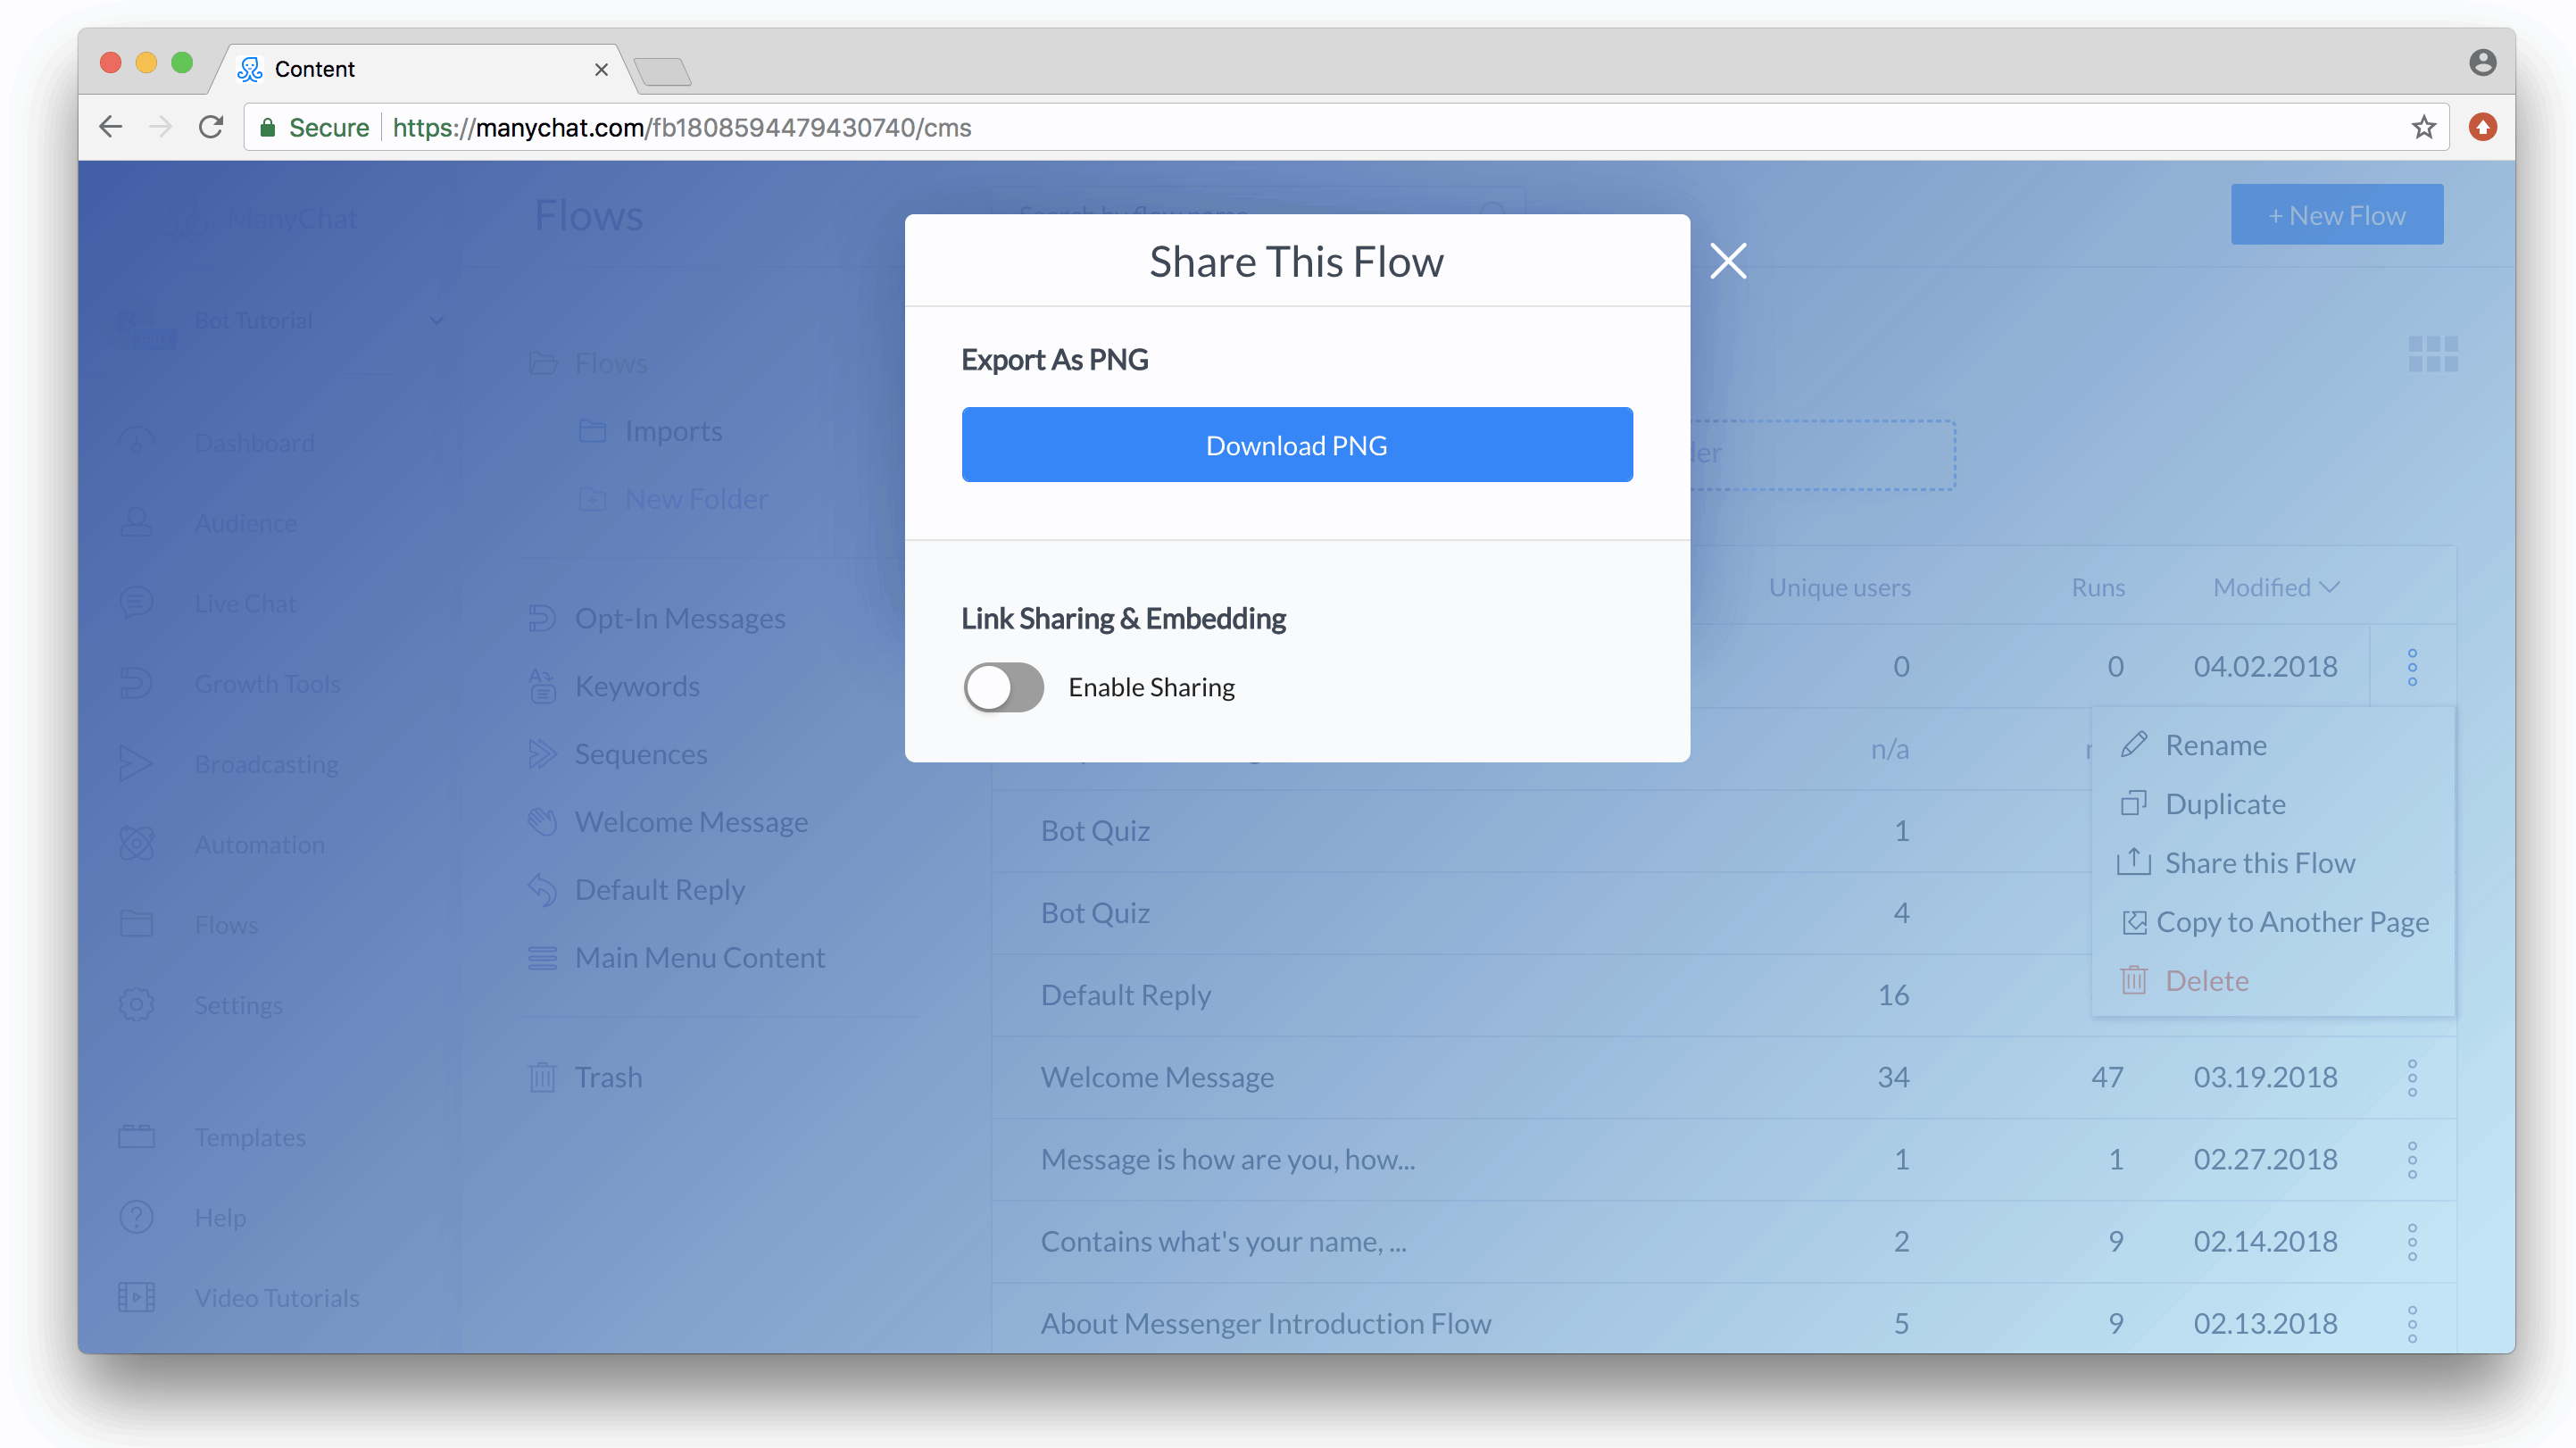
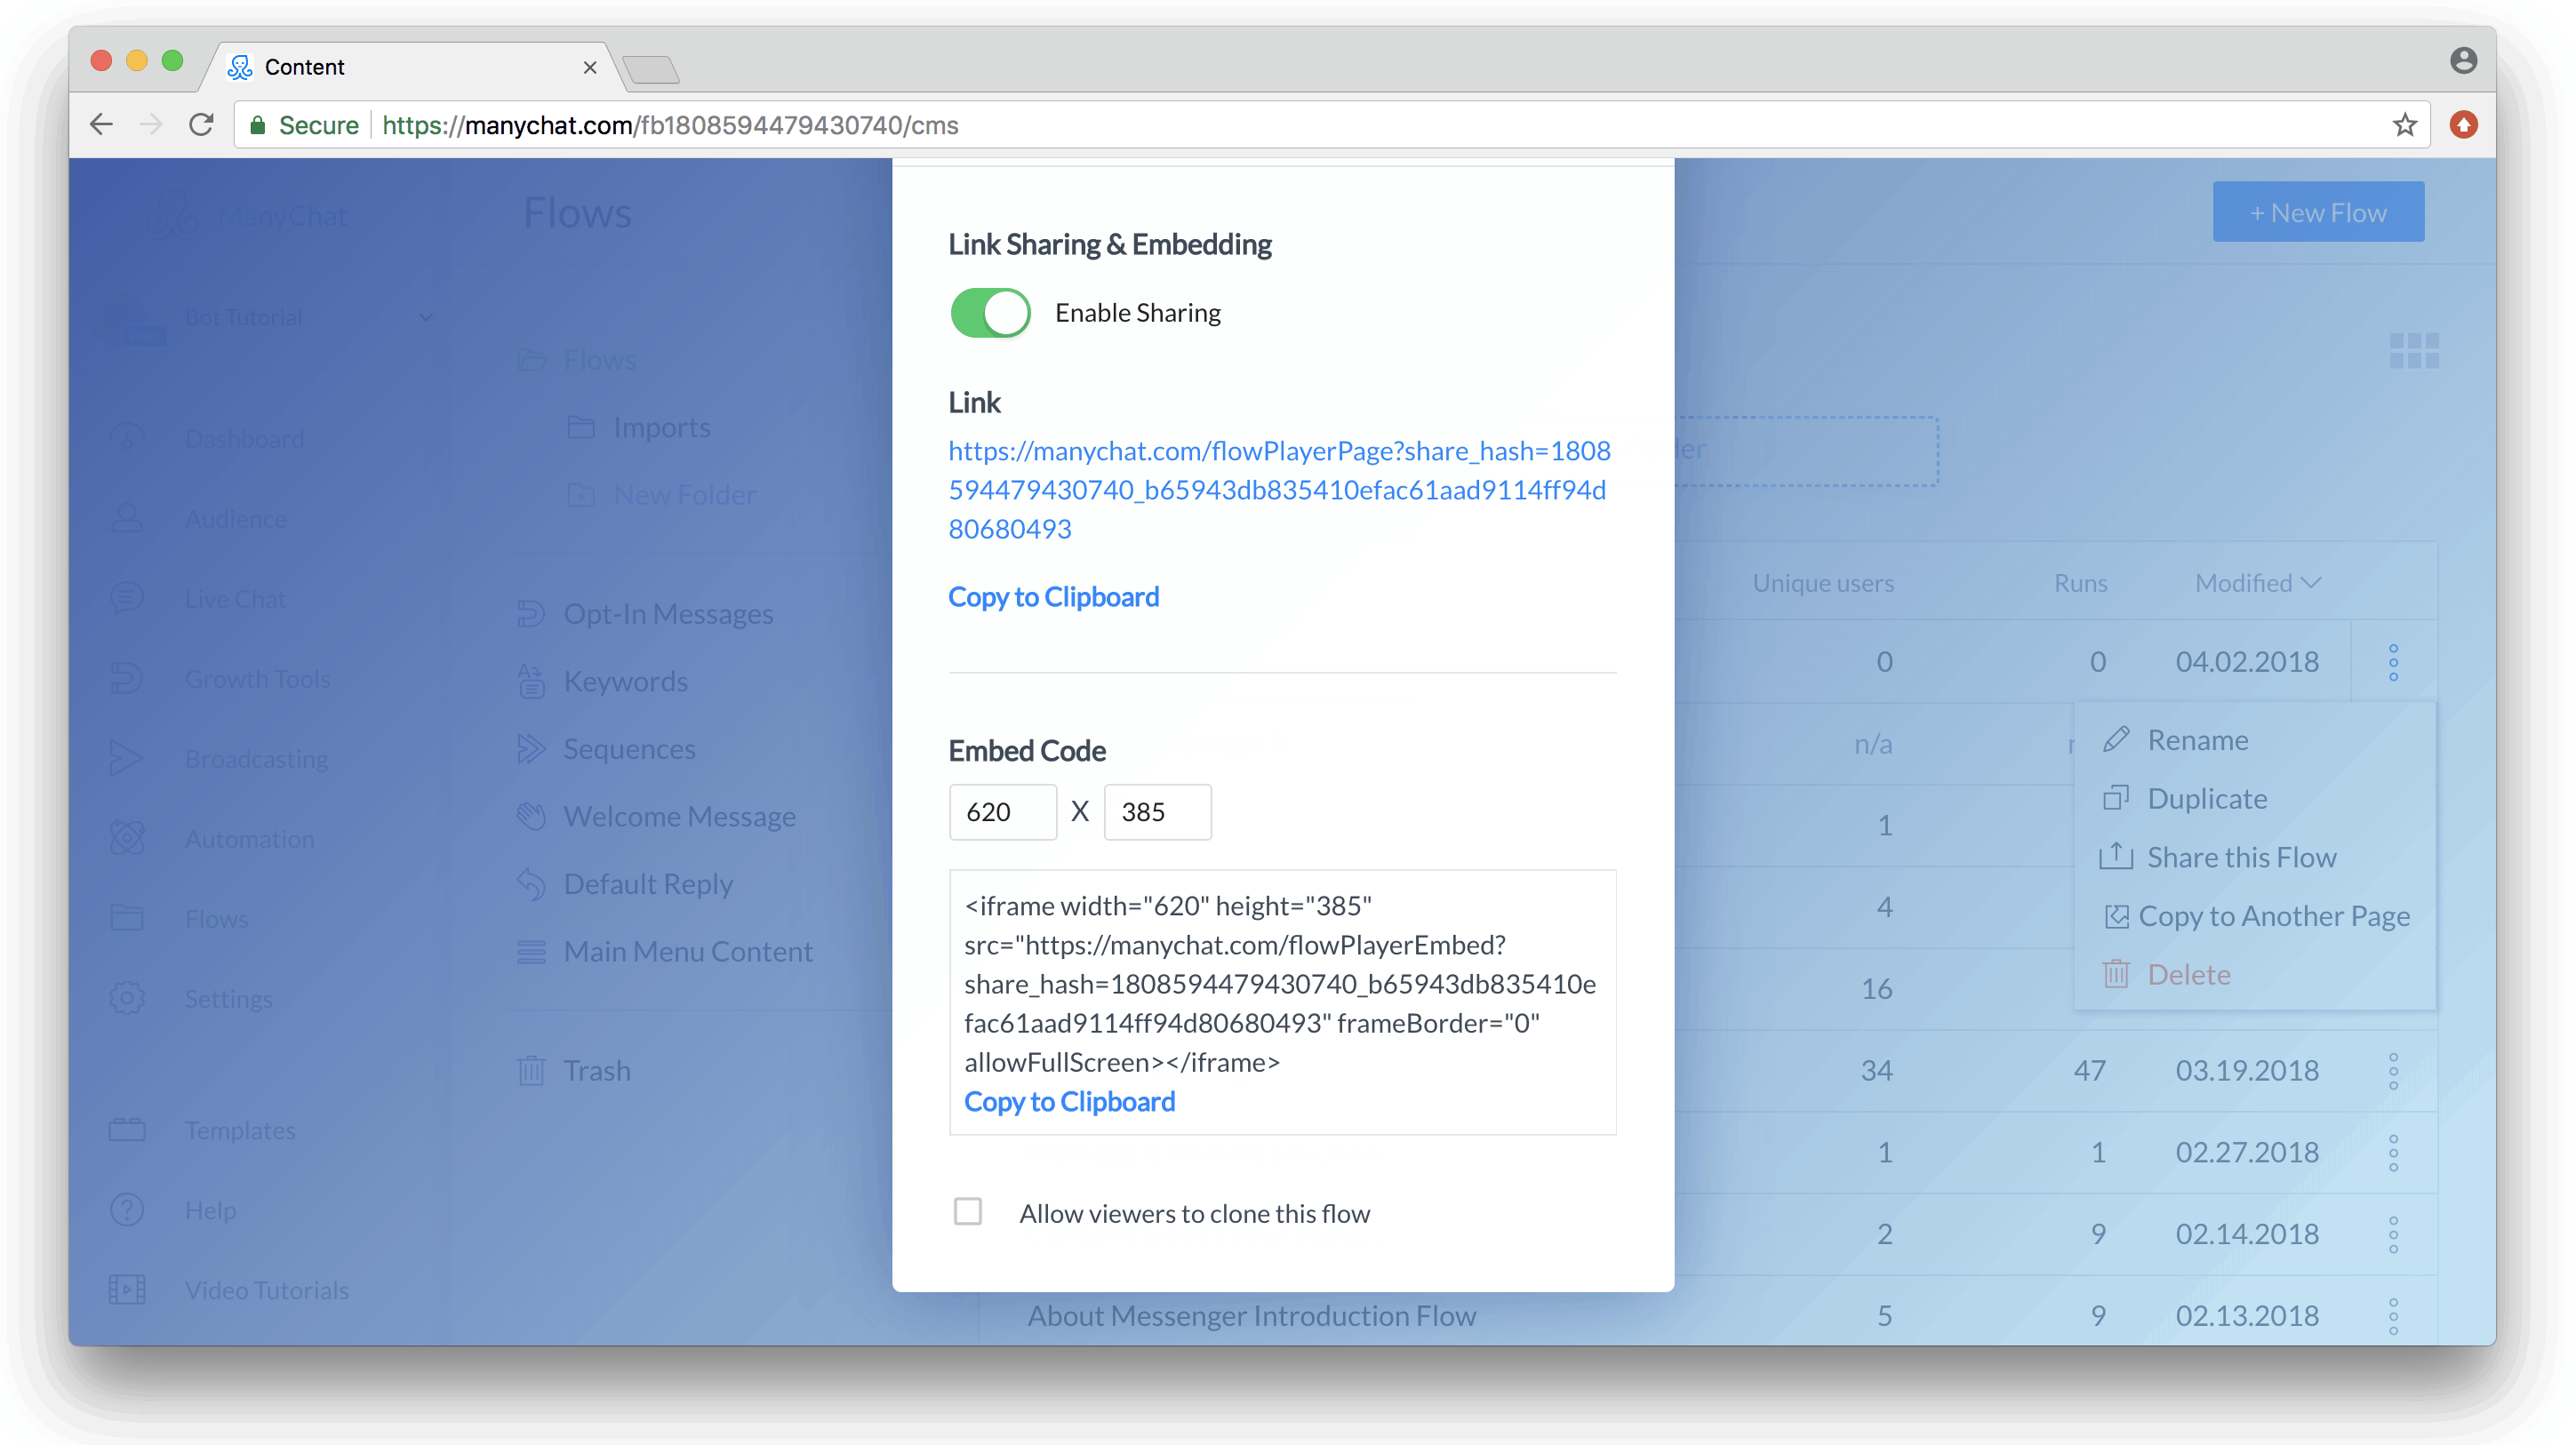
Enabling sharing allows you to obtainthe link., Thethe link.This flow can be accessed through the preview option in Messenger. You can also get the embed code and insert it into your website or blog so that visitors can navigate and preview directly from your webpage (you can also specify the size to fit your page).
ActivateAllow viewers to copy this flowCheckbox to copy it to their accounts (please note that actions and additional flows will not be copied at this time).
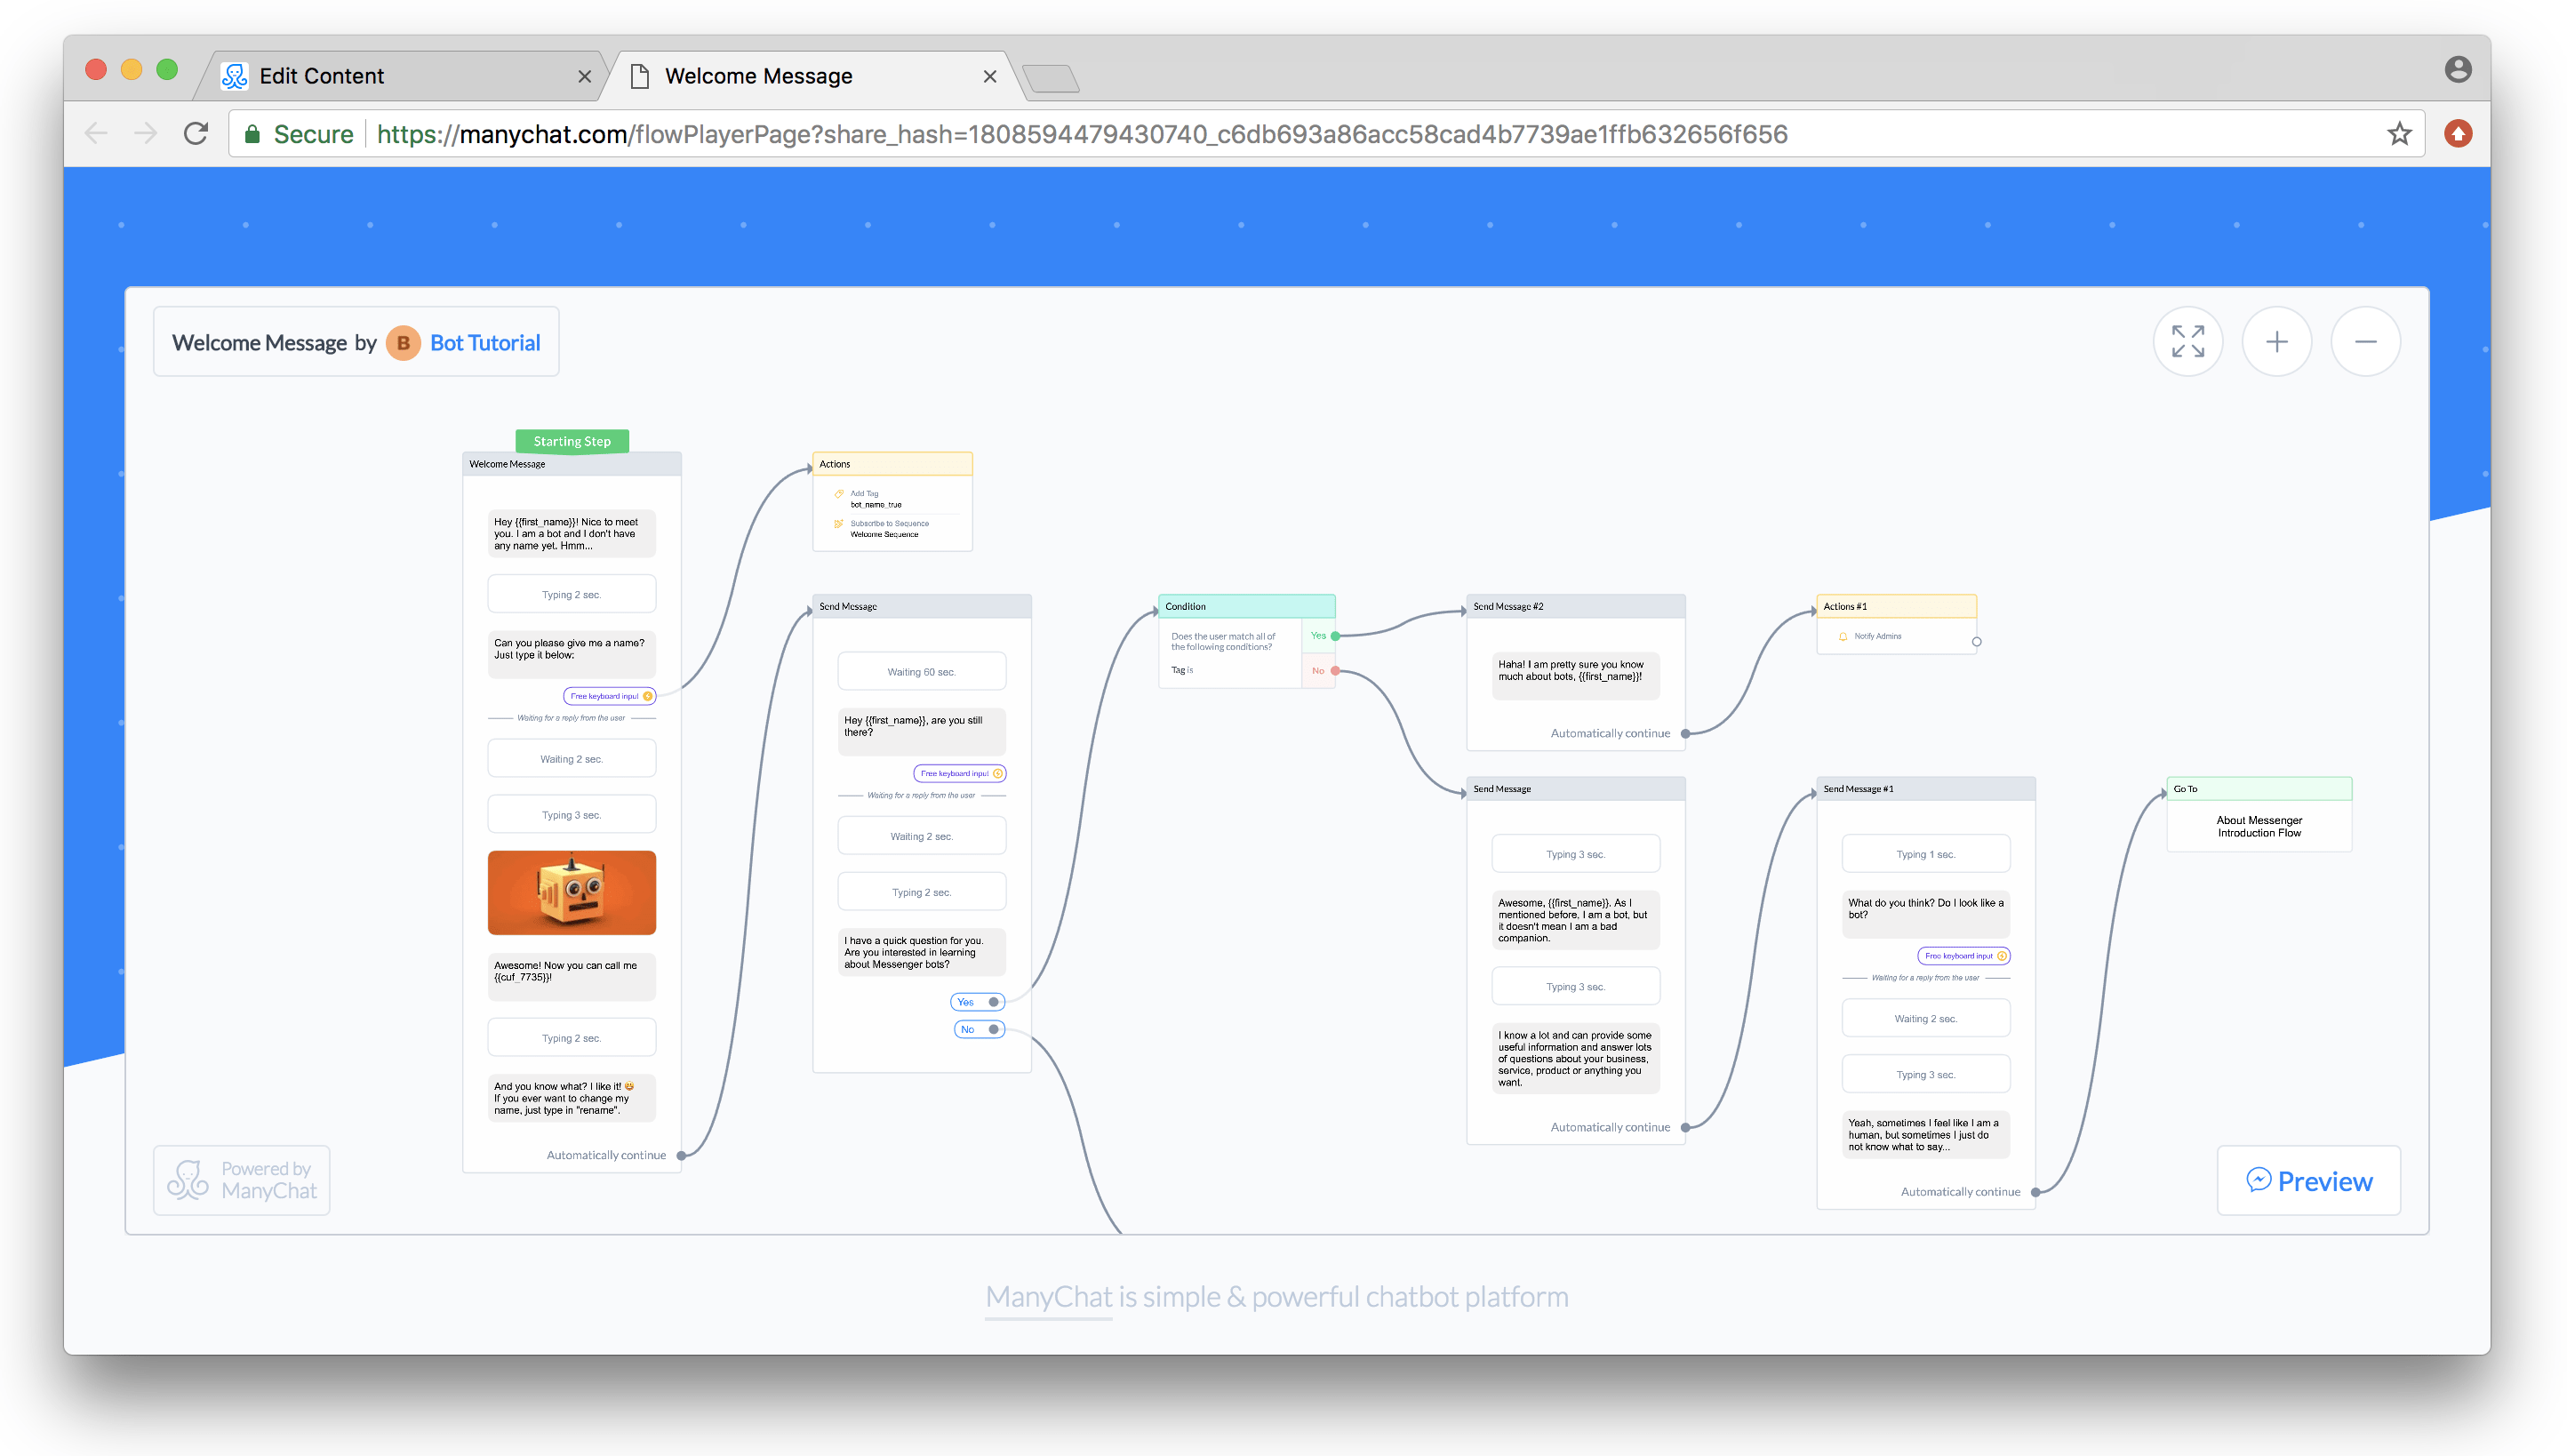
After activating the “Enable Sharing” option, you can access this flow via a link and send it to someone. This is what they will receive:
Copy to another page
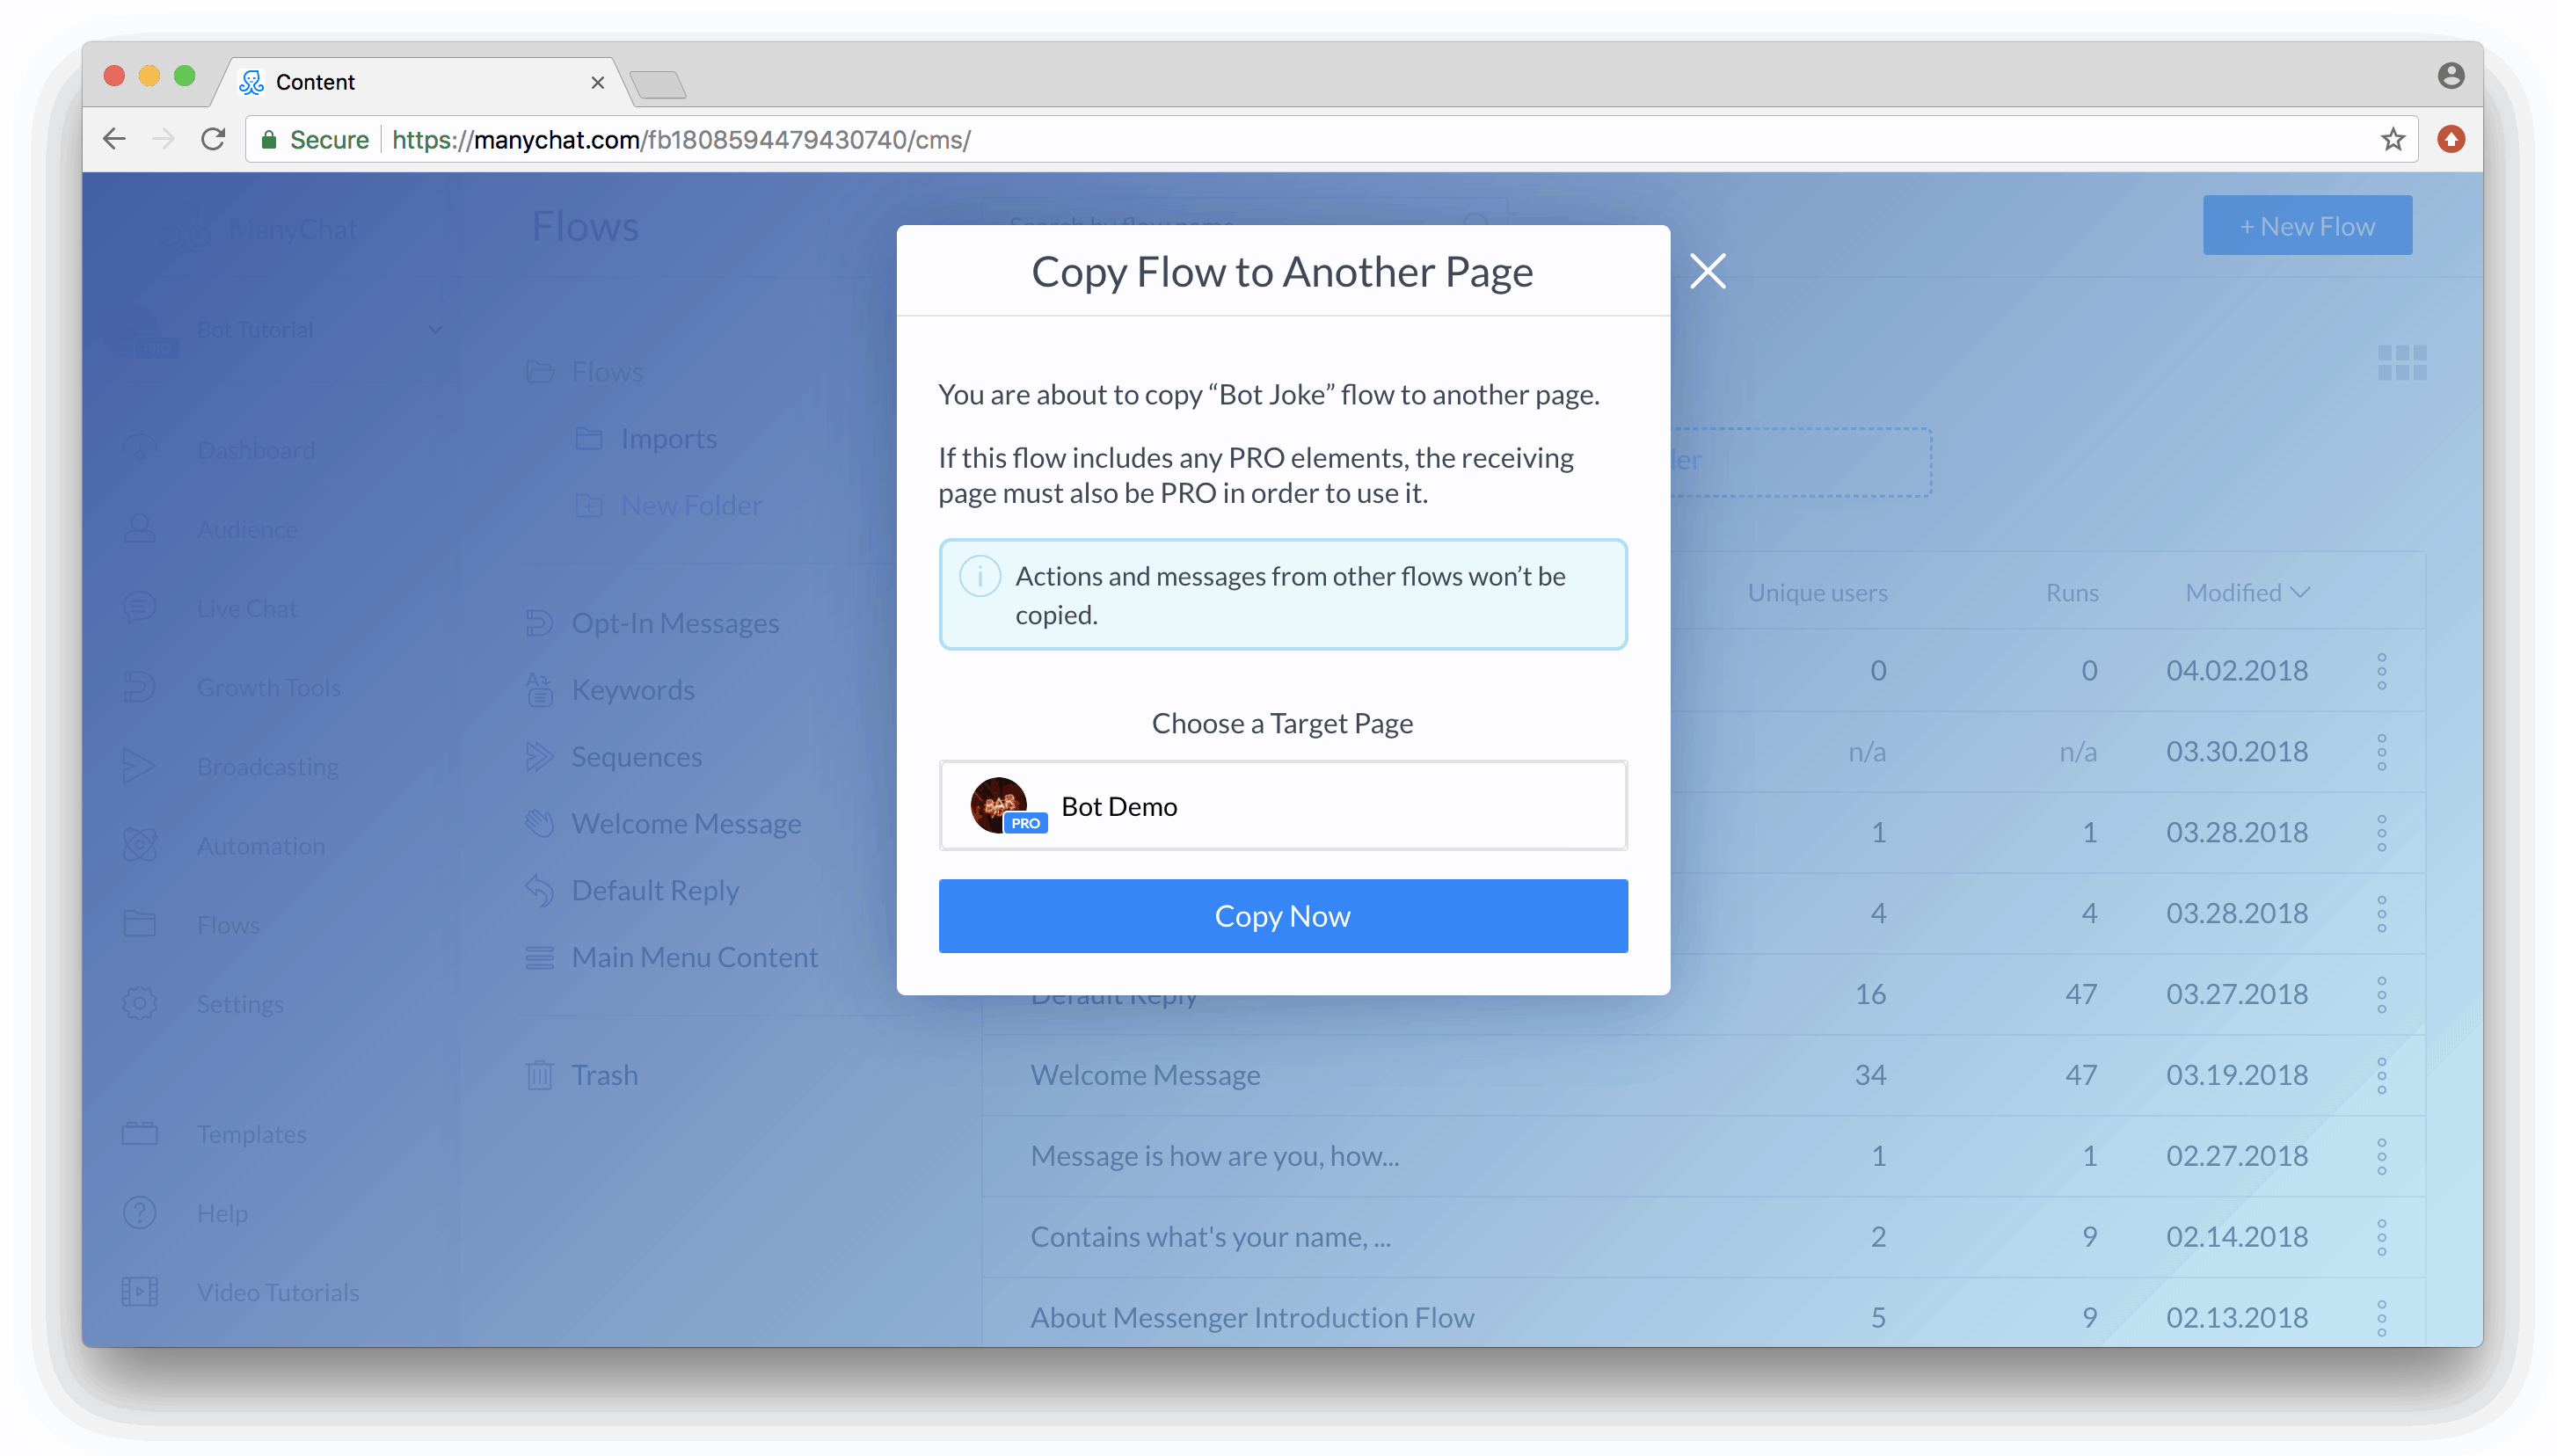
With this feature, you can copy the “flow” to another page you manage. Use the context directory to copy the flow to other pages connected to ManyChat. Please remember that if there are Pro elements in the source flow, the receiving page should also have a Pro subscription to use them.
Currently, “ Copy to another page” feature does not support copying actions (tags, custom user fields, sequence subscriptions, etc.) and messages from other flows (for example, flows attached to the current flow with “go to step” will not be copied).
Select a target page to continue:
After copying your flow to another page, you will receive a success message. Now, you can find this Flow in the receiving page of Flows Manager, which will be displayed asImported.

If you want to copy the entire bot, please use ourBot Cloningfeature.
Folder navigation #
The tree view panel provides you with an overview of the folder hierarchy. By clicking the right arrow icon next to the folder name, you can expand it and see all the subfolders it contains. To view the Flow content in grid or list view on the right side of the screen, you need to click the folder name.
Create new folder #
To create a new folder, navigate to the parent folder where you want to create it, and then click the “Add Folder” button. Please note that the full path of the parent folder is visible above that button.
Move folder #
If you need to place one folder into another, simply click and drag it while holding down the left mouse button/touchpad button until it overlaps with the target folder, then release the button to drop it there. You can also drag and drop folders into the folder tree on the left.
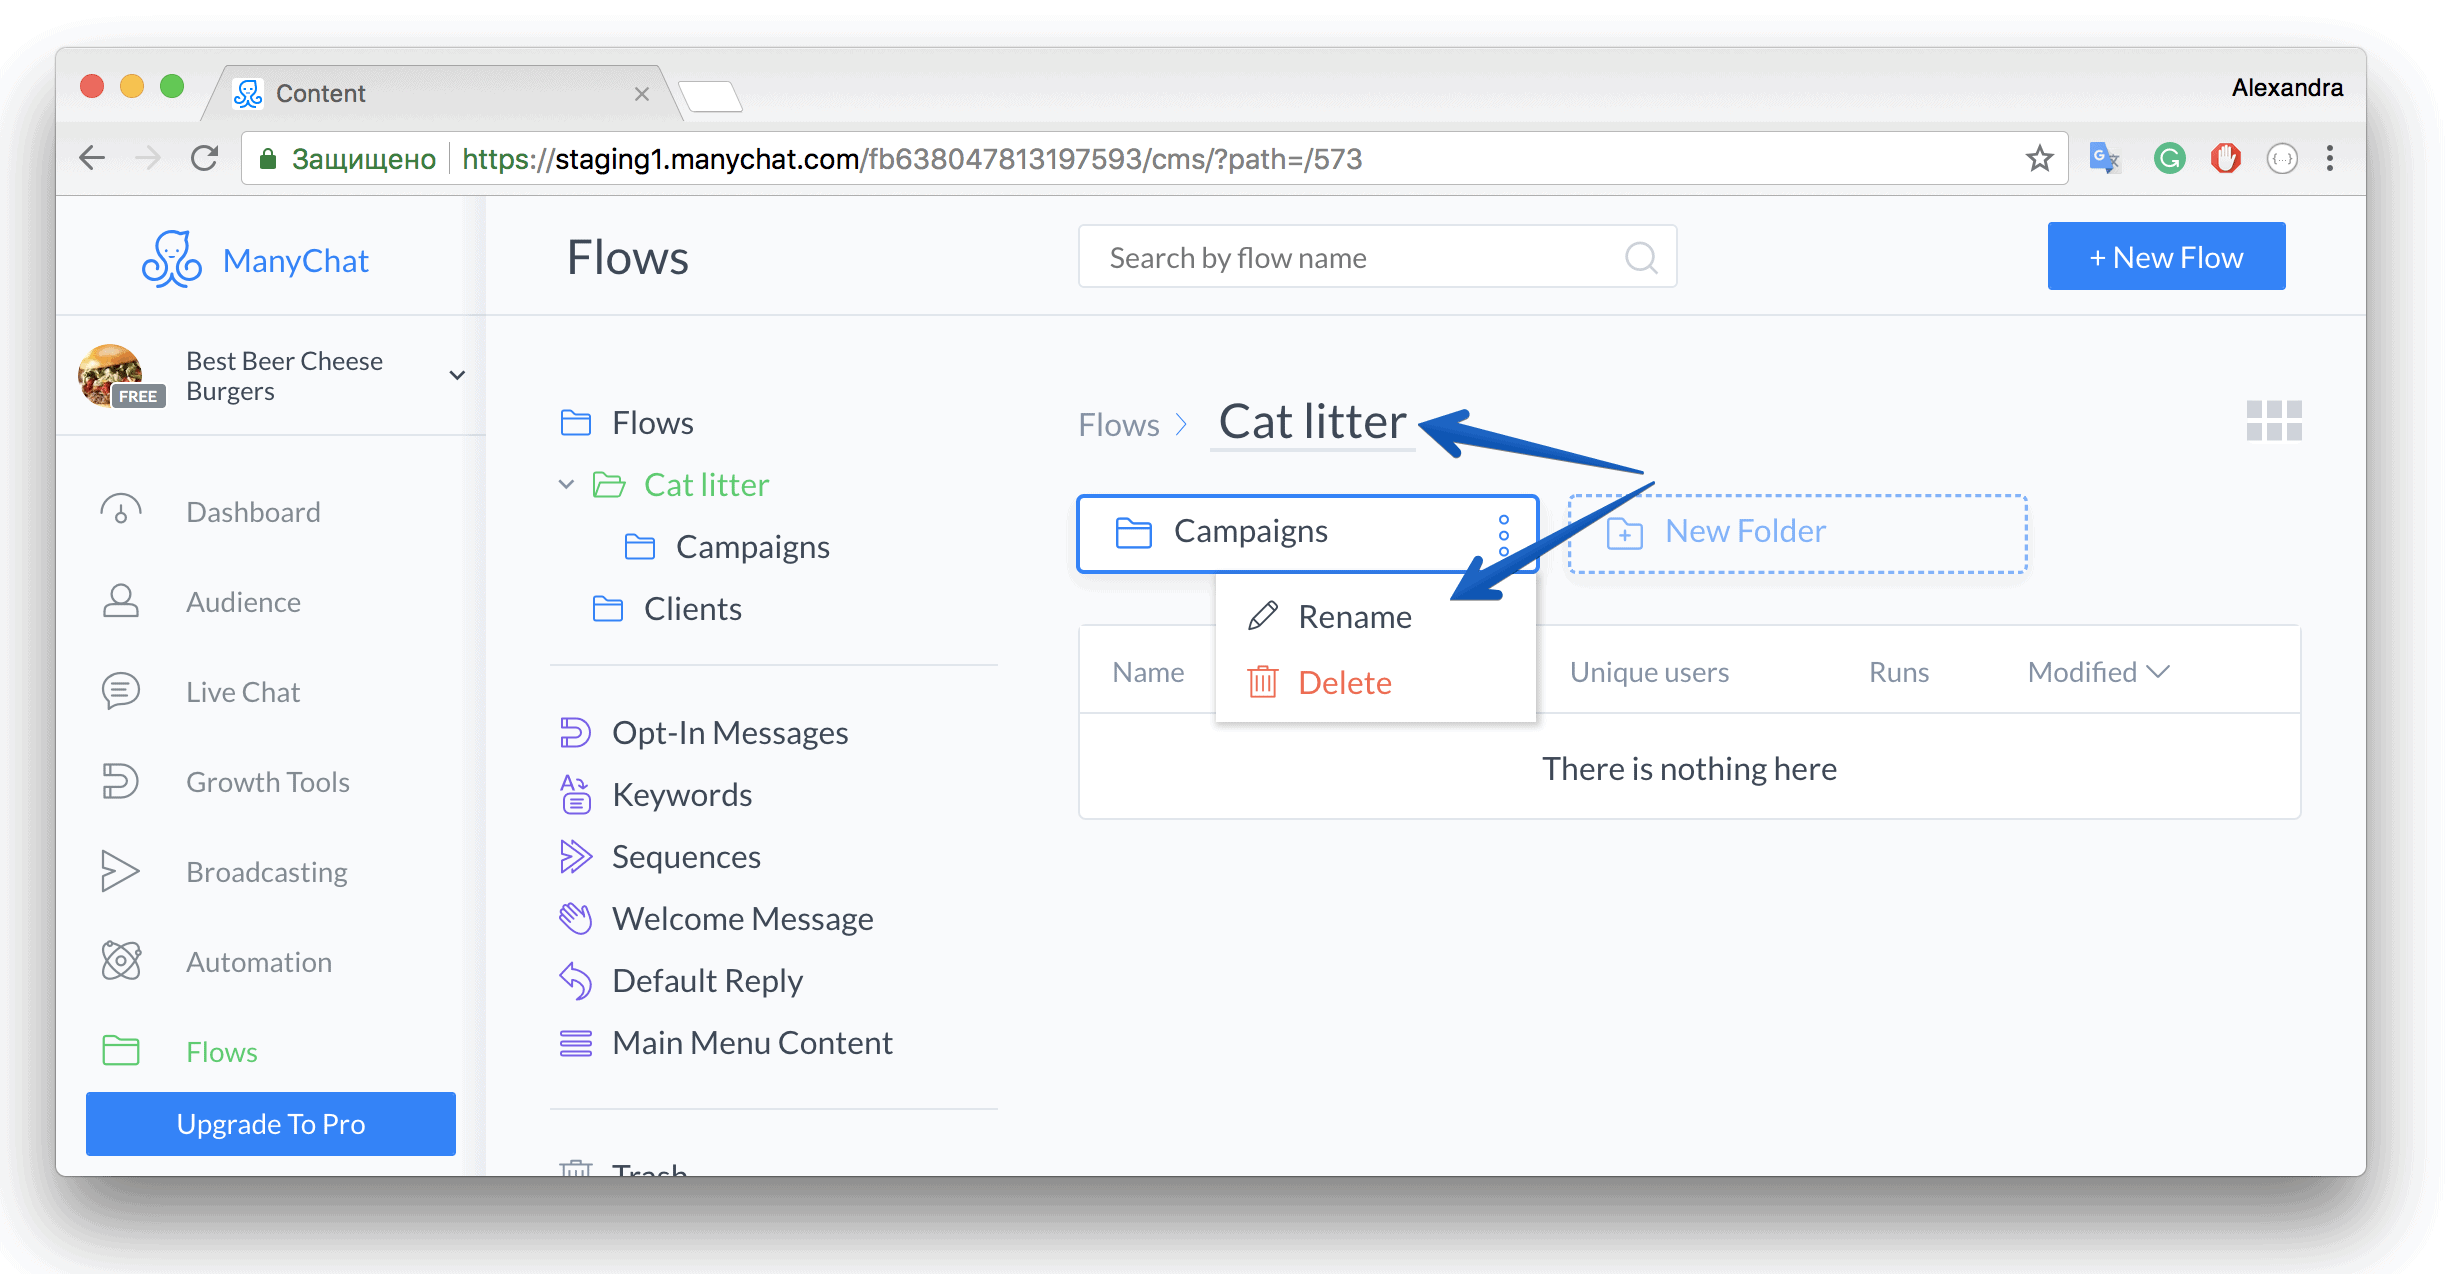
Rename folder #
All folders can be renamed. You can enter name edit mode from the folder's context directory or by clicking the folder name in the full path: