Learning and identifying the target audience is key to successfully launching a campaign. Let's find out how ManyChat can help you.
This is a brief introduction to the “Audience” label. It contains 6 main elements:
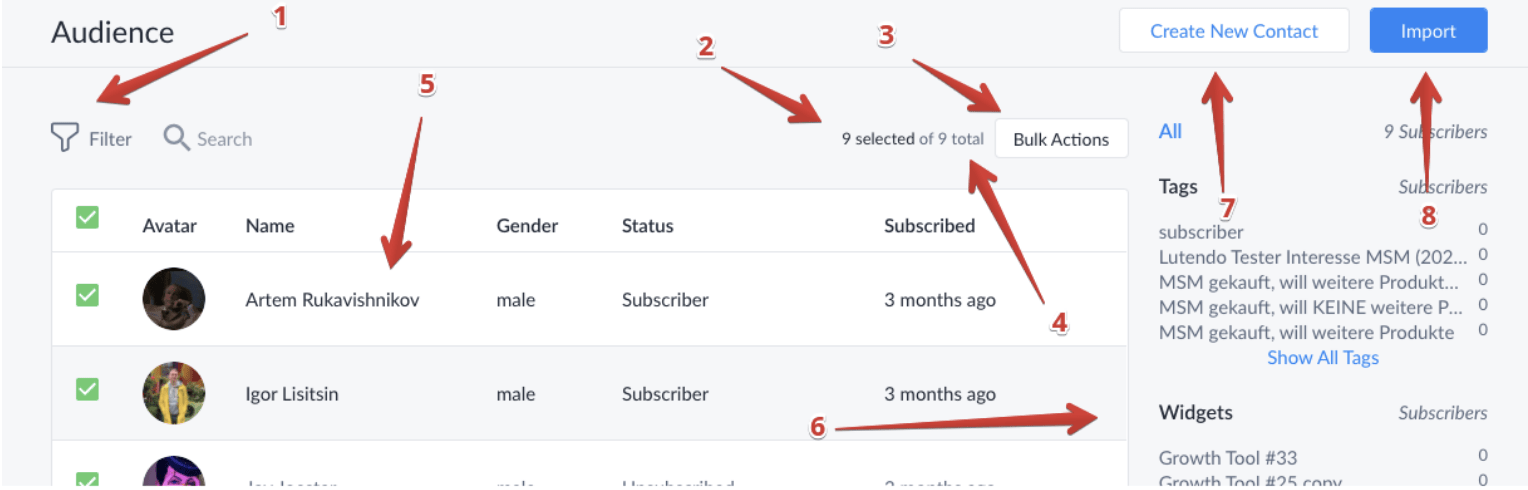
- In this section, you can filter your audience and search for specific subscribers.
- The number of currently selected subscribers.
- You can apply bulk actions to the selected subscribers.
- The total number of subscribers (including users who have not subscribed).
- Your subscriber list. All users who have subscribed to your page are here, including unknown subscribers and unsubscribed users (if you choose to display them in “Settings” -> “General” -> “Audience Visibility”).
- The subscriber list is filtered based on the tools each user chooses to subscribe to/opt-in/etc.
- Create new contacts from scratch and send them messages via SMS and email channels.
- Import a contact list from an existing .csv file so that they are available for SMS and email.
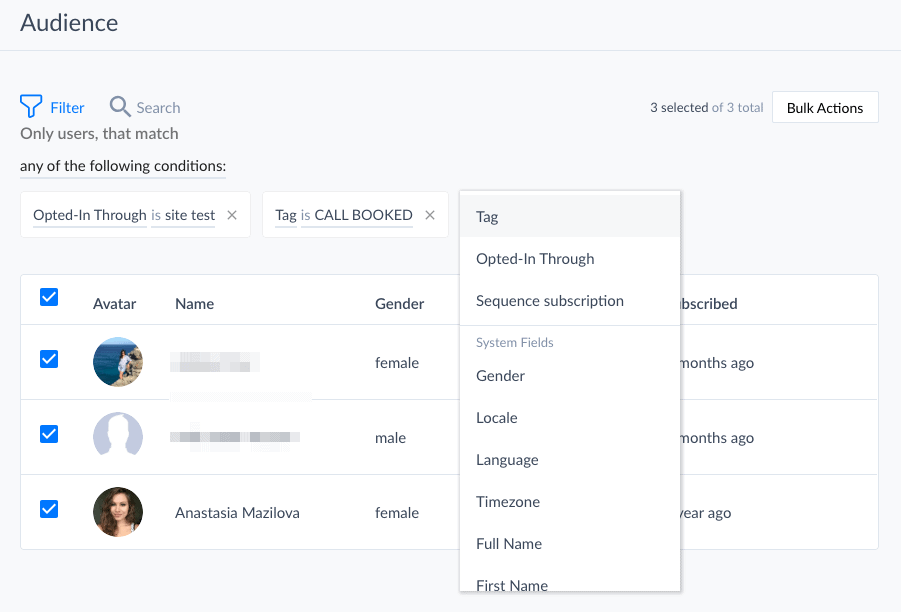
How to filter the audience #
You can also combine these filters to better target and analyze your audience. You can select as many conditions as needed:
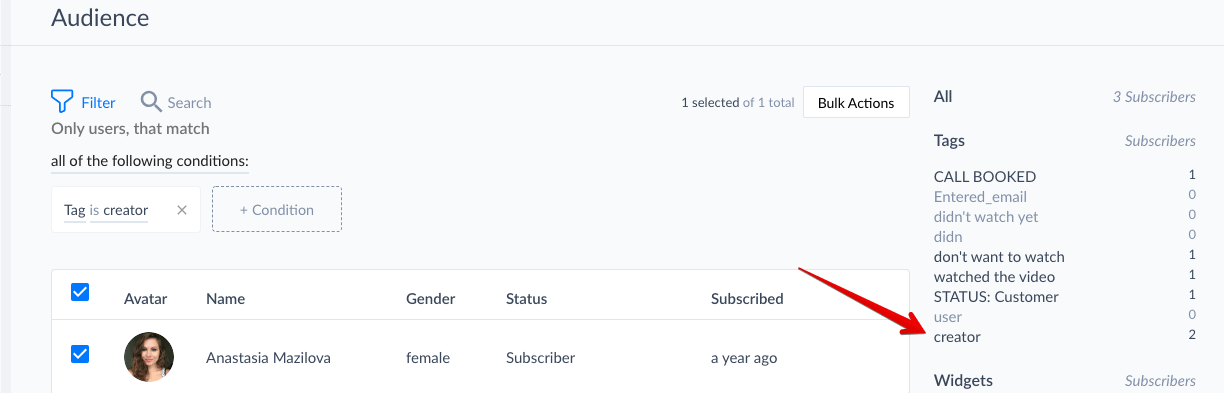
How to use segmentation #
After applying one or more filters to the subscriber server, you can create segments. Once your subscribers have the tags or any other filters used in that segment, they will automatically be listed here.
With segmentation, you can save searches, browse subscribers using a specific set of filters, and use them in “Conditions” to send targeted automated and manual messages.
For example, you can save a customer group with the US country code in their phone numbers and who have spent over $1000 in your Shopify store.

You can browse saved segments in the sidebar and update them when you need to add/remove filters. You can also use saved segments as filters and target your emails based on the segments in the conditions.
What are tags? #
Tags are a way to segment your subscribers. You can add and remove tags from users to indicate whether they are part of a specific group (or not).
You can also use tags to create different content feeds within the router and create subscription options using the main menu. When someone clicks the “Subscribe” button, you can automatically add tags for them using special tags, such as,subscribed_to_weekly_updates, and then broadcast weekly only to the marked audience.
Similarly, you can create an unsubscribe button that will remove that person's tag, thus removing them from the broadcast list.
Think of tags as a way to group your subscribers. By using tags, you can gain insights into your subscribers and provide highly relevant content to those who need it most.
How to delete a tag #
Simply hover over the tag you want to delete and click the red cross.
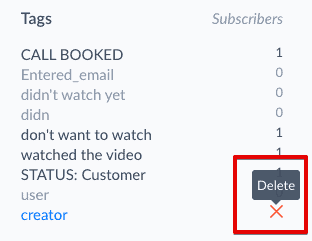
Click “Delete Tag” in the confirmation pop-up.

Bulk actions #
No one likes to click a lot. Well, maybe some people do, otherwise, games likeCookie Clickerwouldn't exist... Well, if you don't want to click too much while performing the same action hundreds of times, then Bulk Actions are your money-saving tool.
After selecting all the desired users, perform any of these bulk actions to tag them, subscribe to sequences, or unsubscribe from the bot:
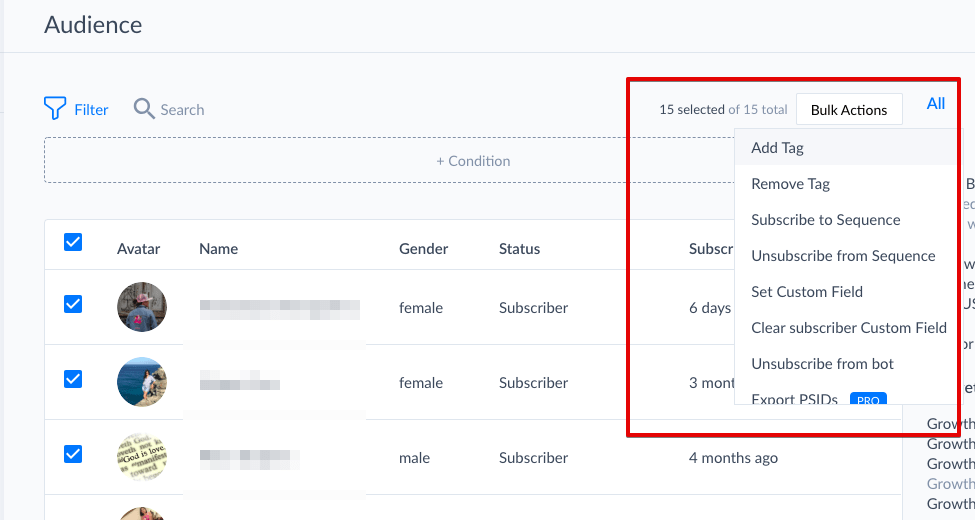
However, to be honest, please be very careful with the last one. If you unsubscribe, we will not be able to recover their audience!
Note that you can also download the PSID (Page Scope ID) for the selected audience. This can be very useful later in Facebook Ads (by uploading the generated file) to target this audience. To do this, simply select the option called “Export PSID.”
PSID is the page range ID of each user in the audience that Facebook uses to process different communication channels.
Companies usually use multiple channels to communicate with customers, such as websites, mobile apps, and Messenger. When someone interacts with a company through Messenger, an ID is created for a specific page associated with the robot in Messenger, called a page scope ID.
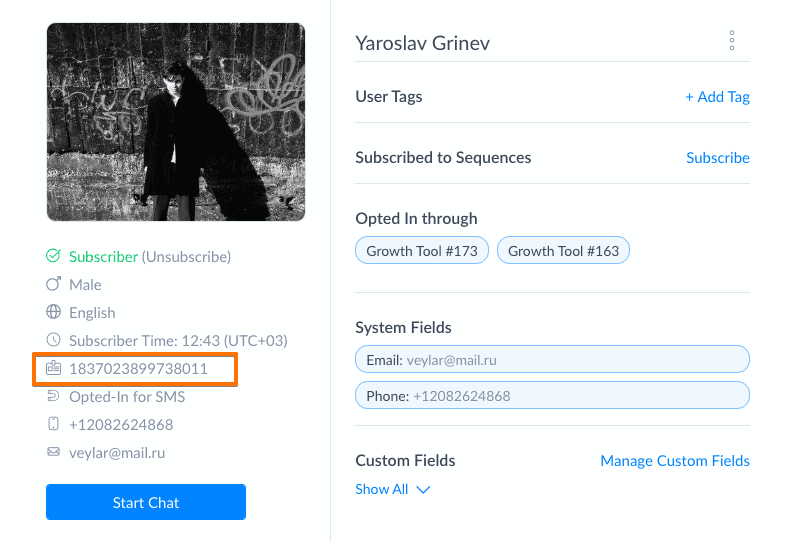
You can find the PSID in each user’s profile in the "Audiences" tab:
You can download the PSID of all users as a .csv file here:
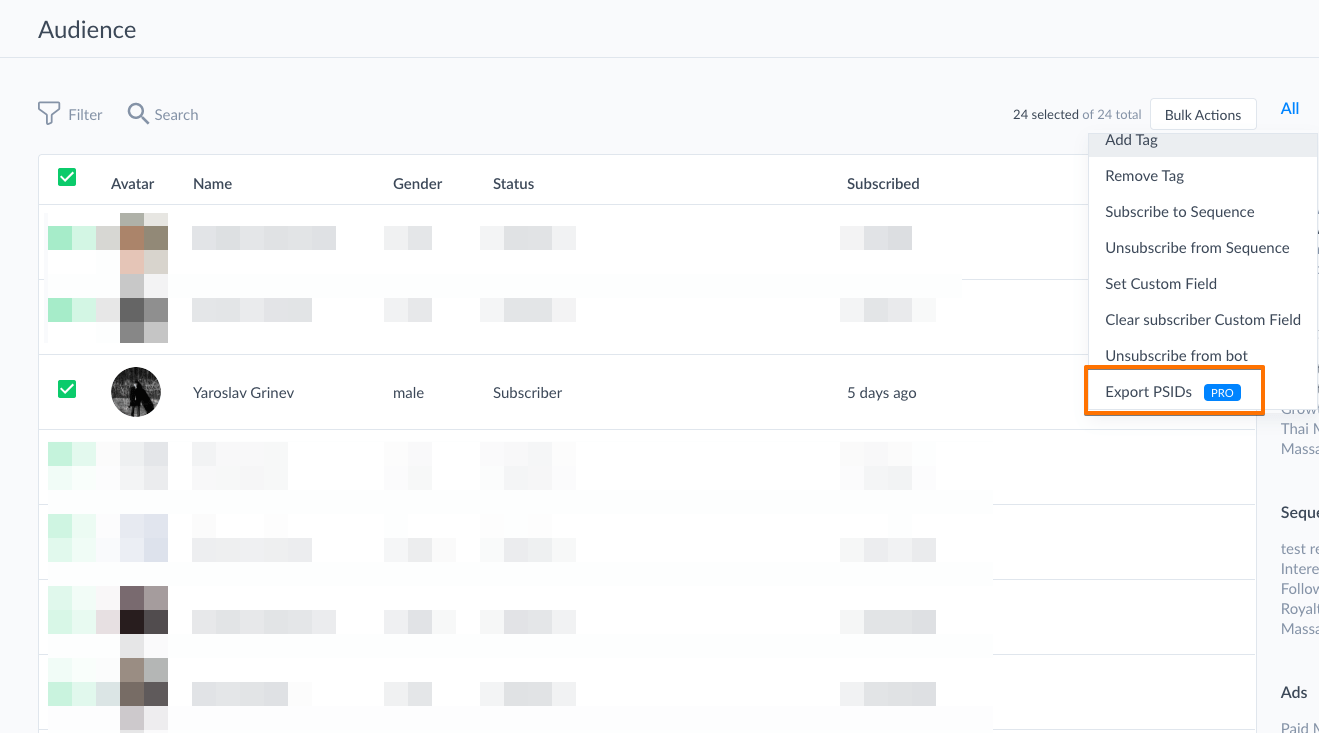
Please note that you will need to subscribe to PRO. The downloaded list will only contain PSID and nothing more. This list can be inserted into, for example, Facebook Ads Manager during targeting setup. Ads Manager will recognize them and you can create custom audiences from subscribers.
You will receive a success notification and see the link to the file:

Click it to start the download.
You can now upload this file directly to Facebook Ads Audiences.
Additionally, you can transfer values from “Custom” to “System Fields” here. Select the option “Export Custom to System Fields” from the dropdown list. Choose the necessary fields and make sure to check other settings. Click the “Export” button to complete the process.
User profilessmall #
Click on any of your subscriber names to access their details.
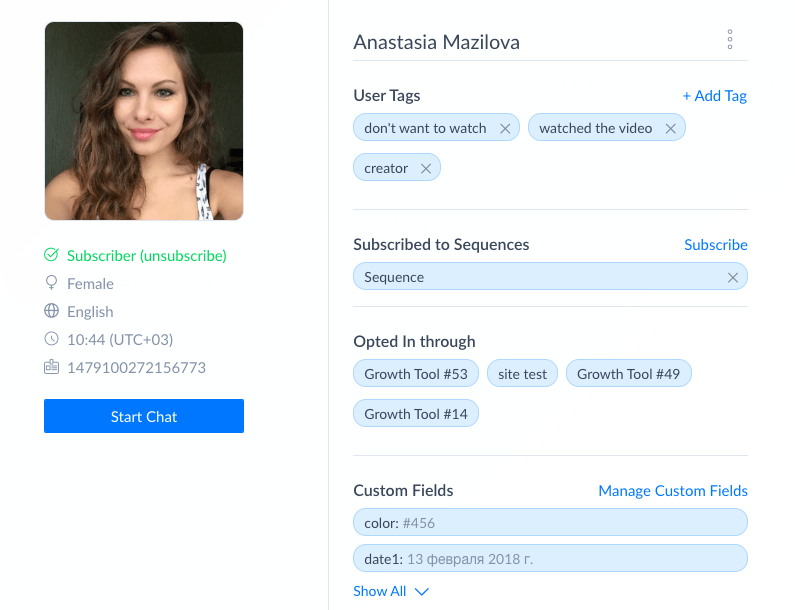
You can check user status, time zone, tags, etc. here. Also, check the “Start Chat” button. You can quickly access the live chat with this user.
Please remember that conversations can be initiated by any message (except keywords) or explicitly started based on the live chat settings. Clicking the button I mentioned above will open a conversation with the user, even if that conversation was not previously displayed in your live chat.
Create new contacts or import contacts
It allows you to use SMS and email features without first engaging the user in a Messenger conversation. However, please note that it is necessary to obtain consent from the person you want to send messages to. Please check our article for detailed guidance:Import contact list | Create new contact


